Post category: How to grow
Varieties
Greenhouse-grown lettuce is of better quality than outdoor crops and it is available from November to May when they are not. Sow the variety ‘Kwiek’ in late August for winter lettuce, and ‘Emerald’ and ‘Kloek’ in September/ October for late winter and spring supplies.
These varieties tolerate cold weather, but without frost protection at least, there can be some losses and the plants will not ‘heart’ up. Watch for greenflies. Do not splash water about or grey mould will attack some of the plants at soil level. Lettuce can also be grown in frames or in low tunnels.
The egg plant or aubergine is a member of the potato family, related to tomato, sweet pepper, chilli pepper and cape gooseberry. It has the typical potato family flowers, purple in colour and flat, star-shaped with a central pointed yellow pistil. Unlike the other potato family crops, the aubergine originated in India, where wild types are still found. Other species occur in various parts of the Far East and are used for food, for instance, in Thailand. It has been used as food for over two thousand years in Asia and several hundred in southern Europe.
It got the name ‘egg plant’ from the very egg-like fruits on some varieties; these are white or creamy and egg-sized and shaped, unlike the fruits on modern egg plant varieties which are usually purple. However, white varieties still exist and varieties with small fruits and even narrow pointed fruits are still grown in some parts of the world. Aubergine is the french name for egg plant, derived from the Arabic name, the Arabs having introduced it to Spain.
To grow aubergine, it can be treated it much like the tomato, best grown in a greenhouse or tunnel, although it can be grown outdoors reasonably successfully in a warm, sheltered setting. Results will be quite good in a good summer, not so good in a dull, cool year.
Cooking aubergine
Aubergine is a very versatile fruit/vegetable, like the related tomato. It is not a juicy fruit and not as versatile as the tomato but it can be used in many ways – in stews or casseroles, baked and grilled. It is a ‘meaty’ vegetable that is filling and used for this purpose in vegetarian cookery. It has almost no calories, not much in terms of minerals or vitamins, and its main value is its ability to absorb the flavours of other ingredients. It is an important ingredient of some dishes. It can be a little bitter and some recipes call for salting it before use.
Growing aubergine
Site and soil: Ideally, aubergine is grown in a greenhouse as it benefits from the extra warmth. But it can be grown outdoors in a warm spot. Indoors it is best grown in the open soil rather than in pots or grow bags, and it needs rich, fertile soft soil with lots of well-rotted organic material.
Varieties
‘Moneymaker’ is a well-known purple skinned variety. ‘Balck Enorma’ is another. White, egg-sized fruits are carried on ‘Mohican’ and ‘Clara’. Some companies offer mixed varieties.
Sowing
The seeds are sown, much like tomato, in late winter or early spring, starting them in a little warmth and growing them on with protection from frost on cold nights. The plants can be sown several to a pot and thinned to one good seedling.
Growing on
It is important to grow on aubergines without a set-back at any stage, potted on as they grow. If they are checked they often flower early and make poor growth afterwards. About five or six fruits per plant is a reasonable target for the large-fruited varieties, more for the smaller ones.
Planting out
Plant out the young plants from pots, usually thirty centimetres or more tall. Generally they have to wait untill mid-May when other plants are put outside and space is created.
Training
Allow the plants to grow to about fifty centimetres, pinching out the main growing points if they grow too tall. The plants might need the support of a light stake, especially as the fruits begin to swell.
Picking
Pick the fruits when they have made good size.
Troubles
Aubergines are very soft plants and attractive for a range of pests, notably greenflies and white flies. It may be necessary to spray with derris to control these.
The sweet peppers, also called bell peppers and capsicums, are varieties of Capsicum annuum, a species to which the hot chilli peppers also belong. The only differences are the size of the sweet peppers which are many times larger than the chillis and the fac that the sweet peppers have no capsaicin, the agent that causes the hot sensation. The capsicums are native to Mexico and Central America where there are records of cultivation for seven thousand years and perhaps longer. The peppers arrived in Europe about 1500, the hot kinds probably first as a substitute for the true pepper. Their cultivation spread to Asia subsequently.
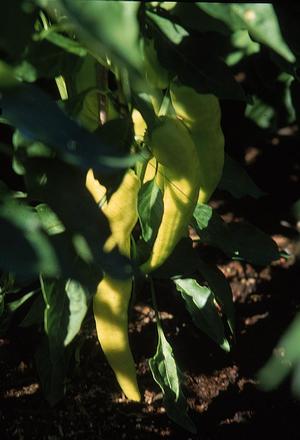
Although the sweet pepper has been in Europe for over five hundred years, it only found its way on the kitchen table in this country in recent decades, and into greenhouses and gardens even more recently. The capsicum is a warm climate plant and really needs to be grown indoors at this latitude but the newer more vigorous varieties can give good results outdoors in a warm sunny, sheltered place. It is related to tomato and not all that difficult to grow, if the conditions are right. The main colour is red – the green ones are not yet ripe but can be used – and there are yellow, orange and purple varieties too.
Cooking sweet peppers
The sweet pepper is a very versatile fruit. Like the tomato, it can be used in many ways, both cooked and fresh. It can be used as an ingredient in many dishes and it is good at absorbing the flavour of other vegetables and herbs, while imparting its own distinctive taste. It is a very good source of vitamin C and vitamin A, good in fibre with little fat and low in calories.
While the tomato is most closely associated with the cuisine of Italy, it first arrived in Europe to Spain from Mexico, not long after Cortes took control of Mexico in 1523. However, it is perhaps fitting that the earliest documentary mention of the tomato is thought to be an Italian reference to a yellow-skinned form in 1544, hence pomodoro, ‘golden apple’. Although tomatoes had been widely cultivated in Mexico before the arrival of the Europeans, there was great suspicion about the tomato when it first arrived in Europe. Botanists of the time knew that many members of the Solanum family are poisonous and they recognised its family features, especially of its flowers.
Tomatoes acquired a reputation as an aphrodisiac and were known as ‘love apples’ and ‘pomme d’amour’. This reputation has faded but it was perhaps instrumental in encouraging people to taste the fruit. While mostly used as a ‘vegetable’, the tomato is, of course, a fruit and a berry at that. This is more obvious with the small-sized cherry tomatoes that with the usual sizes and the large ‘beef’ tomatoes. These latter types are grown for their mealy flesh rather than their juicy seed pulp. A wide variety of fruit shapes is grown, and colours mostly red though yellow and striped too. The tomato plant is a short lived perennial and it is not hardy, though some variety are more tolerant of cool conditions than others.
Cooking Tomatoes
Tomatoes are an incredibly versatile food, being used both cooked and fresh in myriad ways. The flavour of tomatoes complements many other foods, balanced as it is between acid and sweet flavours. The colour of the fruit is valued in many dishes and the tomato has good nutritional value, being a good source of Vitamins A and C, with some fibre and smaller amounts of many other vitamins and minerals. It contains the valuable anitoxidant, lycopene, the concentration of which is actually increased by cooking although some Vitamin C is lost.
Growing tomatoes
Site and soil: Tomatoes can be grown in a greenhouse or outdoors. Greenhouse tomatoes can be grown in pots or in the open ground. Outdoor tomatoes are successful in most years.
Sowing: Plants can be raised from seeds or purchased. The earliest seeds can be sown in the first weeks of the year for early greenhouse planting, and later planting in April can be made form sowings in February or early March. Choose greenhouse varieties for indoor use. Outdoor varieties are raised from seeds sown in the first half of March to make plants of good size for planting out.
Varieties
The seed catalogues list a very wide range of varieties to which new kinds are added all the time. Classic varieties include ‘Alicante’, ‘Gardener’s Delight’, the beef variety ‘Marmande’ and the cherry tomato ‘Tumbler’.
Planting
Transplant the seedling to a small pot, grow on steadily and plant the tomato plant when it is about pencil height into good fertile soil or compost and do not water much until established and growing actively. Outdoors plant in a sheltered sunny spot in early June. Greenhouse plants must be always just moist at the root, never saturated and never dry.
Flowering
In the greenhouse tomatoes can fail to form on the first flower truss if the plant is too well watered, also the first trusses have a better chance if the plants are gently shaken to release pollen, especially early-sown plants. Outdoor plants will be shaken by air movement.
Training
Greenhouse tomatoes are trained to a single stem, supported by wrapping around a string tied to wires in the roof of the greenhouse, and the side shoots removed continually. Outdoor bush types do not have their side-shoots removed but it is beneficial to tie up the plant to a short stake to assist air movement and ripening.
Picking
The tomatoes are picked when they colour and green fruits that are fully formed will ripen off the plant.
Troubles
Tomatoes have a range of pests and diseases though most of these do not arise. Watch for greenflies and whiteflies in the greenhouse and potato blight outdoors. Tomato wilt caused by root rot diseases can affect tomatoes grown in the same greenhouse soil for some years.
The melon, Cucumis melo, is a very variable species, native to Africa, and later introduced to Asia, where it developed into a range of subspecies. The Romans knew about melons but did not regard them very highly and this is thought to indicate that the kinds they had were not of great quality. The melon we know really began its current phase with the introduction of some sweet kinds form Turkey to the papal estate at Cantaluppe in Italy in the fifteenth century. This strain or subspecies was sweet and soon found its way around the warmer parts of Europe and took the name ‘cantaloupe’.
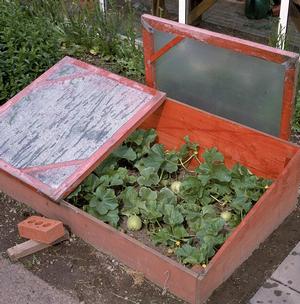
In later centuries, melons were grown under glass in Northern Europe, often using deep beds of decomposing animal manure, or ‘hot beds’, to provide additional heat for very early or late crops. Melons became a highly prized fruit and indeed a freshly ripened melon, just picked, is vastly better than shop-bought melon. Being a hot-country plant, melon needs the protection of a greenhouse, low tunnel or cold frame. While they are a bit of a challenge to grow well, they are not very difficult to grow and if only a few fruits are produced, they are delicious!
Growing melons
Greenhouse melons are quite easy to grow and are of excellent flavour. Sow seeds of the varieties ‘Ogen’ or ‘Sweetheart’ singly in little pots in late March or April. Plant them into rich greenhouse soil, pots or growing-bags when they are about 15 centimetres high, in May. Pinch out the growing-point.
Side-shoots then develop. Retain the two strongest and train them up strings by twisting them around. These can also be left on the ground to spread, if preferred. Further side-shoots will be produced from the two chosen. These are the fruiting shoots.
When the flowers appear and open, take a male flower, peel away its petals and push it gently into the female flower, which can be recognised by the tiny fruit just behind the petals. Pinch out the side-shoot one or two leaves past the young developing fruit.
Allow only one melon to develop per fruiting side-shoot. Feed and water well once the fruit starts to swell. Melons can also be grown on the ground in a frame or low tunnel. Watch out for red spider mite and spray with Liquid Derris on a dull day as soon as it is noticed. Repeat spraying will be necessary.
Using Melon
Melon is mostly eaten fresh, ideally just picked from the vine and still warm from the sunshine. Chilled melon loses much of its flavour. Melon can be used in a wide range of fruit desserts, smoothies and drinks. Melon can be used salads, especially fruity salads with cheese. It can also be used in cooked dishes, generally to make a sweet sauce with meat. Low in fat and cholesterol, it is a very good source of Vitamin A, Vitamin C and potassium.
Cucumbers are thought to have originated as a food crop in India over three thousand years ago. A related wild species still grows there, it is a subtropical plant. The ancient Greeks grew cucumbers and the vegetable gradually found its way around Europe. It is a short-lived plant, an annual that in natural conditions would produce seeds and die after a few months. It is related to the pumpkin and the melon. It needs considerable warmth to grow well and did not feature much this far north until glasshouses, or at least glass cloches and frames became available.
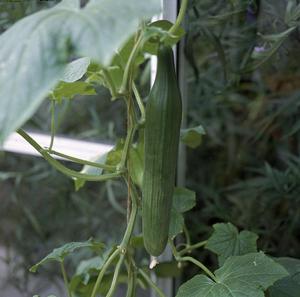
There are varieties known as ridge cucumbers which can be grown outdoors after the danger of frost is passed. These are harder than the greenhouse kind, the outer skin is tougher and often has rough bumps and prickles. The flesh is crunchy and they often have seeds since they are open to being pollinated. Greenhouse cucumbers are generally not pollinated as it changes both the shape and the flavour of the cucumber. The shape of a pollinated cucumber often ends up bulbous and the flavour is strong, bitter even. Preventing pollination used to involve screening bees out of the greenhouse but the modern varieties have only female flowers. A fresh cucumber from the greenhouse is crisp and has a lovely mild flavour, easy to grow but a fair challenge to grow well.
Cooking cucumber
Although cucumber is generally considered as a salad ingredient, it can be used in a variety of ways. It makes excellent salad material, either finely sliced or cut in chunks and can be used with a range of other salad ingredients. It is very good, greek style, with yogurt. It is a cooling food and appreciated in hot climates. But it can be lightly cooked, sliced in slender batons for falsh stir-frying and used with delicate flavours. It can b eaten with skin intact, except the tough-skinned ridge types. It is a good source of dietary fibre, Vitamin C, Vitamin K, magnesium, potassium and other vitamins and minerals.
Plum and cherry varieties
Plums and cherries are closely related, have similar requirements and similar problems. Both kinds flower early; plums a little early before cherries. This means that they must have a warm site. Do not plant where cold winds might damage the blossoms, or where cold, frosty air might collect. Plums and sour cherries can be grown on a west, south or north-facing wall.
’Victoria’ plums
Both plums and cherries like fairly heavy, limy soil, but it must be well drained. Acid soils should have lime applied before planting these fruits. Remove all weeds from the planting site and dig over an area of about one square metre before digging out a hole and planting to the level of the soil mark on the stem.

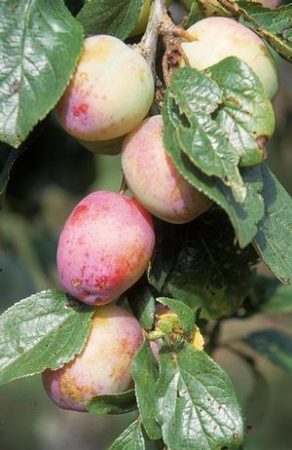
A heavy set of plums thinned
The best sour cherry variety is ‘Morello’ which can be grown as a tree or a wall-trained fan. The only variety of sweet cherry suitable for gardens is ‘Stella’ a recent introduction. Other sweet cherries are too large, and need pollinators. Both ‘Morello’ and ‘Stella’ can be grown on their own, usually grafted on the ‘Colt’ rootstock, which is quite vigorous.
There are lots of plum varieties but the outstanding variety for garden use is still ‘Victoria’, which has been grown for over a century. Generally only one plum tree is planted and this is the one to plant. It is self-fertile and less prone to frost damage to its flowers than other varieties. The red-flushed yellow-orange fruit is of good flavour, sweet and juicy, in late August.
If you are planning to plant more than one tree, the variety ‘Opal’ crops earlier in August and it is reliable, smaller than ‘Victoria’ but similar in appearance. For a late variety, try ‘Coe’s Golden Drop’, which has excellent flavour but needs a warm summer and early autumn to ripen fully, and would be more likely to ripen when wall-trained. This one is not self-fertile and needs a pollinator such as ‘Dennistion’s Superb’, which is self-fertile and crops in mid-August. Greengages are a form of plum with smaller fruit but need more summer sunshine than is usually available in this country. Plum varieties are grafted onto a rootstock. The Pixy rootstock is somewhat more dwarfing than the former standard rootstock St Julien A.
Training and pruning
Plums and cherries can be grown as trees or wall-trained fans. Of the restricted shapes only the radiating fan shape is suitable for the growth habit of plums and cherries. Train wall trees into a fan shape by tying in the young shoots as they grow and pruning out badly-placed shoots.
‘Victoria’ is too vigorous as a wall tree, unless there is a lot of space available. Train plums and cherries as free-standing trees by shortening the young shoots by about one-third of the length, each April for the first few years, letting the trees take their own shape.
Plums or cherries must not be pruned in winter because there is a good chance of diseases getting in through the wounds. Prune plums in spring in the early years and , once established, prune after fruiting. Plums fruit on wood of all ages, and so, some thinning, and the removal of dead, damaged and diseased wood is all that is necessary.
Sour cherries fruit on the previous year’s wood so, each year, some old shoots should be removed in late spring, to encourage new growth. Sweet cherries fruit on spurs on old wood. Little or no pruning of free-standing trees is necessary. Wall trees should have new shoots shortened to 10 centimetres in July, once the branch framework is established.
Feeding
If the trees are growing vigorously and failing to crop, they need no feeding for a year or two. After the fist two years, give 30 grams of sulphate of potash per square metre in March. If the trees have cropped heavily or growth is not good, give 70 grams of general fertiliser per square metre. Well rotted compost or manure could be used on poorly growing trees too. On very acid soils, apply some lime every three or four years.
Thinning and picking
Plum trees, especially ‘Victoria’, often set too many fruits – even to the point of breaking branches. If too much fruit is allowed to develop, it tends to be small and of poor quality. Thin out plums to about 5 centimetres apart in late June. Wait until the natural fall is complete. No thinning is needed for cherries.
Pick plums and cherries ripe off the tree and use them within a few days, they keep for only a short time. Remove all the fruit from plum trees, because the old, withered fruit can be a source of disease the following year.
Weeds, pests and diseases
Use Roundup to kill off weeds under plums and cherries. Hoeing may damage the surface roots. Established plum trees and sweet cherries grow happily in grass.
Greenflies usually attack plums and blackfly attacks cherries, each year. Keep a close watch and spray if numbers begin to build up. Plum sawfly grubs bore into the fruit making them fall early. Treatment is to destroy the early ripening, affected fruits and destroy fallen fruits. Spraying with a contact with Malathion or similar can be carried out in June and early July.
Bullfinches often strip out the flower buds on plums and cherries in rural areas. The crop can be badly affected. Netting may be necessary. Blackbirds and starlings may attack ripe cherries. Netting can be considered.
Silver leaf causes a silvering of the leaves, and a dark stain in the wood of the affected twigs. If the stain is not present, feeding usually restores the tree. If it is present, remove the affected branches completely as soon as they are noticed, as the disease is a killer.
Bacterial canker affects the trunk and main branches, causing off-colour, shothole of the leaves, wilting and death of the tree, often during winter. Copious amounts of gum usually oozes from an infected tree. There is no cure. Both silver leaf and bacterial canker attack through wounds and pruning cuts. Do not prune in winter. Apply Liquid Copper, Dithane or Bordeaux Mixture at leaf-fall as a precaution – especially in wet localities.
Brown rot attacks plums and, occasionally, cherries. The fruit turns brown, with creamy white spots. Do not leave any old fruit on the trees over winter as it will be a source of infection the following year.
Pear varieties and planting
Pears need a good site to succeed. They flower earlier than apples and so they are more vulnerable to frost. Fruit quality, too, is better in a warm situation. Pears will not be a success if there is too much exposure to wind. The best results are got by growing pear trees on a wall facing south, or west, to provide shelter and extra warmth.
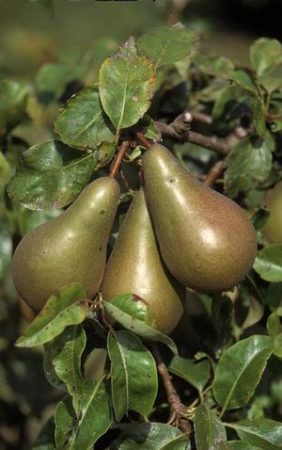
’Conference’ pears
Ideally, the soil should be deep, free-draining, moisture-retentive and fertile. Pears tolerate heavy soil better than apples and dislike dry conditions at the roots. If the soil is poor, for wall trees it is worthwhile removing the top 50 centimetres of soil over an area of one square metre, and replacing it with good soil mixed with well-rotted manure, compost or peat.
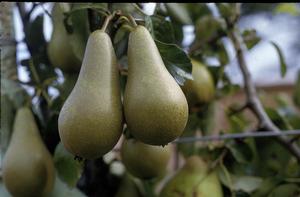
’Concorde’ pears
November to March is the planting period and November is the best month. Remove, or spray off, the existing grass or weeds and dig the soil over a square metre or so. Incorporate a couple of bucketfuls of well-rotted manure or compost at the site for each tree.
Buy the trees and soak the roots before planting. Dig holes 45 centimetres wide and 30 centimetres deep. Drive a stake in each hole to support the young trees. Trim any damaged roots. Test the tree in the hole for depth, and plant at the same depth as the soil mark on the stem. Fill in and firm gently. Tie each tree to its stake.
Space cordon trees about 150 centimetres apart; fan, espaliers and spindle bushes about 240 centimetres apart; and free-standing pyramid trees about 4 metres apart.
Wild pear trees can be large, fifteen metres or so, and cultivated varieties are grafted onto dwarfing quince rootstocks. Quince is related to pear and can be grafted onto it. Quince A is a moderately dwarfing rootstock and Quince C is more dwarfing. Most varieties are offered on Quince C, often double-grafted to get over the problem of incompatibility of some varieties with the quince rootstock.
Pear trees are usually three or four years old when they are offered for sale and already of fairly good size, and, very often, they can be brought into fruiting within a year or two of planting. The varieties of pear on sale are mostly the traditional three kinds, ‘Williams Bon Chretien’, ‘Conference’ and ‘Doyenné du Comice’. The first is a fairly early sort and the other two are midseason. Late varieties often run out of growing season and fail to mature. All three varieties are compatible for cross-pollination as there is an adequate overlap of flowering. ‘Concorde’ is a newer variety but has not surpassed the older ‘Conference’. ‘Packham’s Triumph’ is also quite a good variety. ‘Beurre Hardy’ is reputed to have some resistance to scab disease but can be slow to begin cropping. It is essential to plant at least two of these as none is self-fertile, although ‘Conference’ will sometimes make seedless fruits, elonagated and narrow. Place a soild stake with each tree because the quince rootstock does not provide good anchorage and it is common for trees to lean over if inadequately supported.
Training pear trees
The restricted shapes – cordon, fan and espalier – suit pear trees well. They can be trained as cordons on wires, or as espaliers or fans on a wall or fence. Train them to shape, tying in young shoots in the correct position and removing surplus.
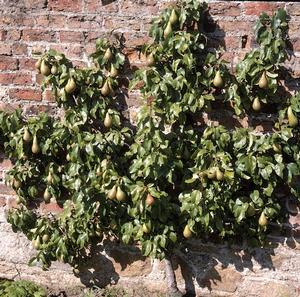
Fan-trained pear tree on a sunny wall
As free-standing bushes, pears quite naturally take on a pyramidal shape. Tie in a central stem to the stake and allow side branches to develop to form the pyramidal shape. Remove badly placed branches. Pears can be slow to bear fruit and often take between three and seven years to begin. Much depends on the site and soil conditions and the size of the tree when planted.
Pruning and feeding
Pear trees carry most of their fruit on short spurs on older branches. Once pears settle down to fruiting they need very little pruning; just remove dead, damaged or diseased branches, and an old branch here and there if there is crowding or the tree is getting too big. Remove some of the old fruiting spurs on restricted trees to improve fruit size.
However, if a pear tree does not carry a crop, its vigour goes into producing branches instead. Summer prune the surplus strong young growth by removing about half of the number of shoots and shortening the remainder to about 10 centimetres during late summer. Wall-trained trees are most likely to need this treatment.
Pear trees should be given 70 grams of general fertiliser per square metre in March if they are carrying a good crop. If the trees are over-vigorous, apple sulphate of potash at a rate of 30 grams per square metre instead. A mulch of rotted compost every few years is beneficial by conserving moisture in summer, but should not be applied to over-vigorous trees. Feed and mulch old trees to get them growing again.
Thinning and picking
Thinning is not usually necessary, but sometimes the variety ‘Conference’ produces too many fruits. Reduce the fruit to one per spur, or two if many of the spurs have no fruit. Early July is the time to thin.
Pears do not ripen on the tree. They mature, then fall off and ripen on the ground. Pick the fruit when it looks mature, and put it in a cool place, indoors. Pears will soften for eating within a few days or a few weeks, depending on variety, but do not continue to store them once they have softened.
September-ripening kinds, such as ‘William’s Bon Chretien’ ripen after a week or so off the tree. ‘Conference’ matures later and can take a few weeks to soften. If pears are picked too soon, they tend to simply dry up and wither without softening. If they are picked too late, the fruit softens quite quickly but soon develops brown mushy flesh at the centre.
Weeds, pests and diseases
Keep the ground free of weeds by hoeing. A mulch will help to keep down weeds. Pear trees crop better when not grown in grass, even when established.
Greenflies may attack, and may need to be controlled. Pear midge is a little fly whose maggots bore within the fruit, hollowing it out and causing it to fall early. Though not very common, this pest can be troublesome. Destroy all the early fallen pears. Birds may attack both fruit and buds.
Pear scab is the most common disease and causes black spots and cracking on the fruit. Though it is not as widespread as apple scab, precautions may be necessary in wet seasons and in wet, cool localities. Cracking can also be caused by sudden changes in the weather or by drought.
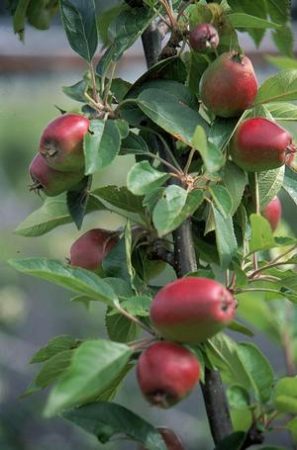
Apple varieties
Apples will not crop well on exposed sites; near the coast, or over 200 metres above sea level. Do not plant on a north-facing slope, or at the bottom of any slope where frost might gather.
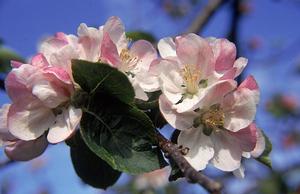
Apple blossom awaiting pollination
Choose a warm, sheltered spot, not shaded in any way – especially by large trees that would rob the apple trees of food, water and light. Too much shelter, on the other hand, increases the risk of disease attack, because the foliage stays damp longer.
The ideal soil is deep, fertile, well-drained but moisture-retentive, and slightly acidic. But apple trees grow well on most soils, as long as they are well-drained. They can suffer potash deficiency on dry limy soils and, by contrast, tend to be over vigorous and prone to disease on heavy, limy soils.
Peaty soils are too generally too wet and infertile for apples. Replace poor soil, if necessary, to a depth of about 30 centimetres.
There are hundreds, possibly thousands, of apple varieties, and a wider range is probably available now that at any time in the past, because many old varieties have been revived. It is worth trying some of these if the space is available. But if you have space for only a few trees, then the choice will be far more restricted.
Apple varieties divide into cooking apples and dessert apples. Cooking apples are acidic to taste and their crumbles when cooked. Although the flesh of dessert varieties stays intact, they can be used for cooking too. It may be decided not to bother with a cooking variety, if space is limited. If it is desired to have cooking apples, ‘Bramley’s Seedling’ is the only variety to consider, as it crops and stores well.
Of dessert apples, the early-fruiting ‘Discovery’ is excellent, and disease resistant, with luscious red fruit that can be eaten from the third week of August. ‘Scrumptious’ is a new early variety, bred from ‘Discovery’, that is showing promise. ‘Lord Lambourne’ is an old variety for September, very reliable, with some self-fertility, disease-resistant and grows well in less favoured areas in the west and north.
For a late variety, to use from October to December, but not to store much longer, ‘Red Devil’ is red with pink-stained flesh, disease resistant, and self-fertile. ‘Elstar’ is a good cropper to use until January and ‘Idared’ has scab resistance and stores until early spring. ‘Winston’ is very disease resistant, self-fertile, green flushed red and stores very well until March, the colour and flavour developing. Trees with several varieties grafted on, called ‘family trees’, are available.
Rootstocks
While the rootstock on which the tree is grafted will affect the size to which it will grow, most trees are sold on the dwarfing rootstocks M9, or M26 which is somewhat more vigorous. MM106 is more vigorous again and makes a tree that will grow to three metres or more in width. Least vigorous of all are trees on M27, which is suitable for very small spaces and trees to grow in large pots.
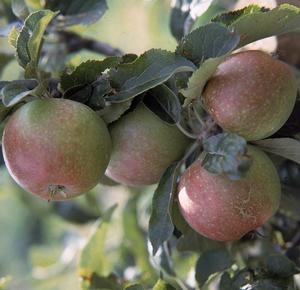
A nice set of apples on a young tree
Choosing tree shape
Tree shape should be chosen to suit the garden. If space is very limited, the restricted tree shapes – cordon, fan and espalier – are ideal. Cordons are grown on wires between posts. Use four wires, each 30 centimetres apart, the first at 45 centimetres above ground level. Support the wires on strong wooden or steel posts, about 5 metres apart.
Fans and espaliers can also be grown on wires, or on walls or fences. The restricted tree shapes take up little space – trees will be only about 45 centimetres deep and about 180 centimetres high. These shapes are suitable only for dessert varieties.
Where there is a little more space, free-standing spindle–bush trees can be grown. These are supported only by a strong 180 centimetres stake. Spindle bush trees are kept to about 200 centimetres high and about 150-200 centimetres wide. Both spindle-bush trees and restricted trees must have dwarfing rootstocks to keep them small.
If there is plenty of space, open-centre bush trees can be grown. Kept to about 3 metres high and about 3 metres in spread, these trees should have semi-dwarfing rootstocks. Some old orchards have large trees, up to 8 metres high, grown on vigorous rootstocks, which are no longer used, but these old trees are very difficult to prune, spray and pick fruit from.
Planting
November is the best month for planting but apple trees can be planted until the end of March. Decide on the planting site, tree shape and varieties. Remove, or spray off, the existing grass or weeds and dig the soil over a square metre or so. Incorporate a couple of bucketfuls of well-rotted manure or compost at the site for each tree.
Buy the trees and soak the roots before planting. Dig holes 45 centimetres wide and 30 centimetres deep. Drive a stake in each hole to support the young trees. Trim any damaged roots. Test the tree in the hole for depth, and plant at the same depth as the soil mark on the stem. Fill in and firm gently. Tie each tree to its stake.
Space cordon trees about 150 centimetres apart; fan, espaliers and spindle bushes about 240 centimetres apart; and open-centre bushes about 4 metres apart. The quickest to bear fruit are cordons and spindle bushes – often in the season after planting. The more vigorous cooking varieties, trained as open-centre bushes, may take up to ten years to crop well – especially on heavy soils.
Training
The training procedure used will depend on which tree shape has been chosen. Restricted trees – cordons, espaliers and fans – are often bought with the initial training done. Simply tie the shoots into position to hold the existing shape. Surplus shoots, and those that are badly placed and cannot be tied into position, should be removed.
To train trees from scratch, they should be no more than two years old. The wood is still pliable and the young shoots can be tied into position as they grow. Bare-root trees are usually only two years old, but container-grown trees can be several years old and may already have bad shape that is difficult to correct.
For spindle bush trees, tie-in the main leader to the stake. Allow both the leader and the side shoots to develop. In July, tie the side-shoots down into a horizontal position to induce early cropping.
In the winter after planting, release the ties and shorten the first year’s growth by about one-third – both leader and side-shoots. Repeat this procedure in subsequent years until the spindle bush shape develops. Maintain the central stem from which the horizontal side branches arise. Do not allow rival leaders to develop.
For open centre bush trees, shorten the main shoot to about 75 centimetres above ground level. Select four or five of the side shoots that develop, if these are not already present. Shorten these to half their length each year, allowing them to become the main framework branches.
Do not allow a central main leader to develop. Remove branches that tend to grow toward the centre of the tree. This is kept open to let in light and air.
Pruning
When all the young apple trees have been given their initial training for four or five years to form their shape, annual pruning will be necessary to maintain the desired shape and to promote the production of good quality fruit.
Apple trees carry the largest, sweetest fruit on branches between two and five years old. To maintain a fair proportion of branches of this age, some of the oldest branches in the tree are pruned out each year and younger ones allowed to take their place. The idea of replacement is the key to pruning apple trees.
There are two periods for pruning – December/January and July/August. Winter pruning encourages growth of new shoots. Summer pruning discourages growth.
Winter pruning
This is the main pruning period for the free-standing, open centre bush and spindle-bush trees. Start by removing all dead, damaged or diseased branches. Next, select two or three fairly sizeable branches from among the oldest on the tree.
Make the choice by reference to their position, bearing in mind the correct shape of the tree and the existence of a younger replacement branch. Usually the choice is easy, because an old branch may be crowding a younger one.
Having removed some old wood, then remove, or shorten, all weak and spindly shoots. The remaining strong, young shoots will eventually make good fruiting wood. Shorten these by about one-third of their length. These general guidelines suit all types of bush trees.
For the restricted trees, such as cordons, espaliers or fans, less winter pruning is practised. Heavy pruning in winter would encourage them to grow away from their restricted shapes. In winter, just prune out a few old branches, exhausted old fruit spurs and weak, spindly shoots.
Summer pruning
Restricted trees produce young shoots each summer. About mid-July, begin shortening back the stronger shoots to four or five leaves, at the rate of a few each week or so, until September. Do not bother shortening weak shoots – these can be removed in winter.
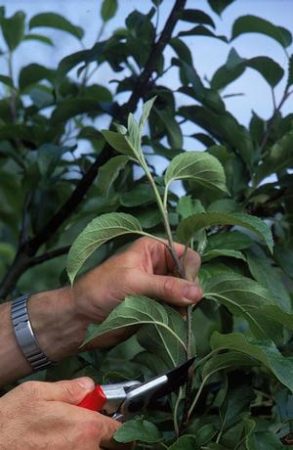
Removing some of the current year’s growth
Bush trees that are very vigorous, but unfruitful, should get summer pruning, and no winter pruning for a few years – until cropping starts.
Feeding apple trees
Apple trees should get 70 grams of general fertiliser, or Fruit Fertiliser, per square metre in February or March each year. The area of the spread of the branches should be used to calculate the quantity. Even quite small trees will need at least 300 grams each on this basis. Fertiliser is essential for good growth and cropping.
If the trees have tended to be vigorous and not produce much fruit, apply 35 grams of sulphate of potash per square metre each year for three years instead, especially on heavy, limy soils.
Unfruitful and neglected trees
Old, over-grown trees can be brought back into production by pruning, feeding and spraying. Prune out some of the old wood and thin out the branches. Feed and spray as normal. Old trees that have deteriorated too much, or are of a bad variety, can be grafted with a new variety.
Apple trees can be unfruitful for a variety of reasons, usually the site is wrong, the soil is poor, or there is no cross-pollination. If these reasons are eliminated and the trees have grown very strongly, producing wood and leaves but few flowers or fruit, the problem is over-vigorous growth. This may have been caused by too-severe winter pruning, or by wrong feeding, and it is a tendency of vigorous varieties planted in heavy, fertile soils.
Bark-ringing can be used as a remedy. This involves removing a 1 centimetre strip of bark from around the stem at blossom time. Seal the cut surface with tape or pruning paint. The restriction in the flow of sap encourages the production of flower buds, and fruit eventually.
Root pruning is another remedy for over-vigorous growth and poor cropping. This involves finding three or four major roots, removing the soil and cutting through the roots.
Fruit thinning
Established apple trees often produce too many small fruits of poor flavour because the tree has not the vigour to swell them all. A certain amount of natural thinning takes place. Only those apples with several seeds actually develop to maturity. Many just drop off after initial development. This usually happens in early July, although it is called the ‘June drop’.
Wait until mid-July when the ‘June drop’ is past. If surplus fruit remains, thin it out to leave one apple for every 10 centimetres of branch length. The apples may not be spaced evenly along the branch, but this ratio can be used as a guide to numbers.
Picking
Apples ripen on the tree and should not be allowed to fall. Pick the fruit when the stalk parts easily. Some varieties must be used quickly – ‘James Grieve’, ‘Worcester Pearmain’, for instance. Others keep for a few weeks – ‘Laxton’s Superb’ and ‘Jonathan’. Some varieties keep well up to March/April – ‘Golden Delicious’, ‘Bramley’s Seedling’. ‘Crispin’, ‘Idared’ and ‘Queen Cox’.
‘Lord Lambourne’ apples
The keeping varieties can be stored in polythene bags with the top left untied and with a few small holes in the bag to allow air exchange. Store only clean, unbruised fruit of varieties known for their keeping qualities. If a refrigerator is available, the fruit can be stored at a low setting.
Re-grafting old apple trees
In December or January, collect young shoots of the new variety. These should be about 30 centimetres long. Tie them into a bundle and place it in a cool corner of the garden with the bottom 7.5 centimetres in the soil. In mid-April, cut down the main branches of the old trees, leaving them about 90 centimetres long. Remove any small branches.
Make a sloping cut on one of the young shoots above the soil mark where the bunch was in the ground. Trim the top end to leave the piece about 15 centimetres long. Make a slit in the bark of a branch stump of the old tree. Insert the prepared shoot, making sure the cut surface is in good contact with the wood beneath the bark of the old branch.
Tie the grafted shoot tightly in place and seal all the cut surfaces with grafting wax, such as Tenax, or wrap thin strips of polythene around to make a seal. Cut the ties as soon as the buds break. Train the new shoots to replace those removed. The first fruit will be produced two years later.
Weeds, pests and diseases
For at least the first few years after planting, keep the ground around the trees free of weeds and grass. Dwarf trees compete poorly with grass and may need to be kept weed free for one metre diameter at least. As the trees get bigger, grass can be grown underneath, but it should be kept short.
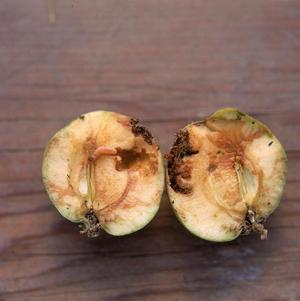
Codling moth larva in an apple
Codling moth grubs hatch from eggs laid on the young fruit and bore in through the ‘eye’. Feeding and growing inside, they eventually eat their way out. Affected apples ripen prematurely and fall off. The pest is very common in town gardens and precautions are often necessary.
Greenflies cause stunting of shoots and fruit. A kind of greenflies – woolly aphid – produces woolly masses on the branches, and severely weakens the tree. Control is usually necessary.
Caterpillars may attack the leaves, but damage is usually slight. Red spider mites may attack in warm summers, causing the leaves to go bronze. If damage is severe, control might be necessary. Bullfinches may attack buds. Netting might be necessary in rural areas.
Apple scab disease attacks leaves, young shoots and fruit – causing black or brown scabs on the latter which sometimes crack. Spraying will be necessary, especially in wet years and wet localities.
Use resistant varieties such as ‘Discovery’, ‘Katy’ and ‘Lord Lambourne’. Spray susceptible varieties at bud-burst, in late March or early April, with Captan or Systemic Fungicide Control or Fungus Clear 2. Repeat the spray at least three times between then and the end of June. In a wet year, and in wet localities, more applications can be necessary.
Apple scab disease
Apple canker is a serious disease causing sunken cankers on branches and trunk. Branches may die. Avoid injury and control apple scab which creates an entry for canker on young shots. Prune out affected branches.
Powdery mildew causes whitish discoloration of young leaves and shoots. A bad attack weakens the tree. Prune out affected shoots when noticed in May and June.
Varieties
Bushes can be planted when dormant or from pots at any time of year. The variety ‘Invicta’ is resistant to mildew. Although ‘Careless’ and ‘Leveller’ are grown too. Bushes should be spaced at least one and a half metres apart each way.
Planting
Gooseberries are pretty robust and tolerate most conditions quite well. Extreme exposure to wind would not be ideal. They tolerate some shade but prefer to be in full sunshine. Red and white currants are very similar and grown in the same way gooseberries, and not like blackcurrants, to which they are also related.
Good, fertile, well-drained but moisture-retentive, slightly acid soil is the ideal for soft fruit. Poor soil can be made fertile by applying organic manures and fertiliser. Limy soil is fine, as long as it is well-drained. Gooseberries tolerate medium-heavy soil well. The ground should be completely free of perennial weeds before planting.
Training
Maintain the single stem clear of side-shoots for 25 centimetres. Allow the side-shoots to develop above this. Select four, five or six strong shoots well separated from each other. Allow these to grow out like the spokes of a wheel, keeping the centre open to prevent disease. These branches form the permanent branch framework.
Care after planting
Control weeds by timely hoeing. Apply 110 grams of general fertiliser per bush in February/March each year. If growth has been very vigorous, apply 55 grams of sulphate of potash instead, especially on limy soils.
Water newly-planted bushes if there is a prolonged dry spell. Some fruit will be produced two years after planting and full cropping is reached after five years. At that stage, each bush will yield between 4 – 8 kilos of fruit.
Pruning
Gooseberries carry most of their fruit on short spurs on older wood. The same spurs flower and fruit year after year. Pruning of gooseberries aims to set up this pattern and maintain it. Having trained the bushes on a ‘leg’ with about five main branches, annual pruning involves removing about half of the young side shoots each year, and shortening the remainder to within about 7 centimetres of the main branches.
Prune away any low-hanging shoots. Annual pruning is done in winter. If the growth of young shoots is very vigorous, remove some of them and shorten the others, during June/July. This summer pruning helps to counteract vigorous growth.
Pests and diseases
Bullfinches eat the buds and can seriously reduce the crop. Watch out for damage in winter and use nets if necessary.
Caterpillars of gooseberry sawfly may eat all the leaves off the bushes. New leaves will appear and the damage will not be too severe if it occurs just once every few years. Losing the leaves every year weakens the bushes, and control will be necessary in this case. Greenflies may attack in large numbers and need to be controlled.
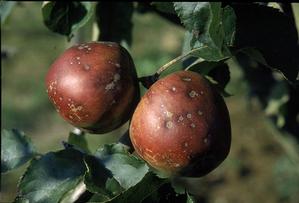
Gooseberry mildew attacks the leaves, shoots and fruit. The fruit becomes covered with a whitish or brownish fungus, but it can be used if wiped clean.
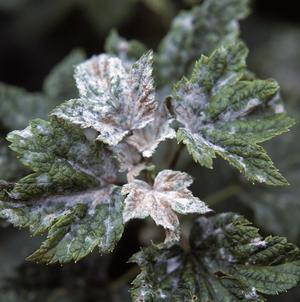
Gooseberry mildew on blackcurrant
Gooseberry cluster cup disease causes little orange spots on the leaves and fruit. It is little more than a curiosity except in areas near peatland and a spray of Dithane may be necessary, applied just before the flowers open.
Grey mould disease (Botrytis) occasionally attacks a few berries and can cause branches to die off. Affected branches should be pruned out.
Varieties
The main criteria for selecting varieties of currants for the home garden are size and growth habit of bush; season of flowering and fruiting; reliability, size and quality of crop, and susceptibility or resistance to diseases and pests. ‘Ben Sarek’ is one of the best blackcurrants for the home garden. It has a very compact growth habit and produces heavy yields (4-5 kg\bush) of large juicy fruits. Because of its late flowering, it has considerable of frost tolerance and reliability of cropping. Ben Sarek is one to the few varieties that is fully resistant to mildew. Other good blackcurrant varieties include ‘Ben Lomand’, ‘Ben Connan’ and the very late flowering ‘Jet’, which is more suitable for frosty areas.
Planting
Blackcurrants prefer full sunshine but can tolerate a little shade for part of the day. Shelter must be provided. Frost is a danger for blackcurrants because they flower early. These are likely to be disappointing at elevations over 200 metres above sea level.
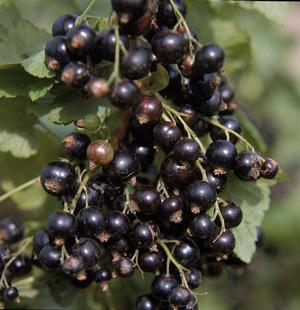
’Ben Lomond’ blackcurrants
Good, fertile, well-drained but moisture-retentive, slightly acid soil is the ideal for blackcurrants. Poor soil can be made fertile by applying organic manures and fertiliser. Limy soil is fine, as long as it is well-drained. Blackcurrants do well in a medium-heavy soil. The ground should be completely free of perennial weeds before planting.
Care after planting
Keep the ground free of weeds by hoeing for the first year. They dislike the soil disturbance that is inevitable with hoeing so hoe as lightly as possible or use mulches.
Each spring, feed blackcurrants with 70 grams of general fertiliser per square metre. This should be followed by a heavy dressing of well-rotted manure or compost, which helps to keep weeds down and conserves moisture in summer. Blackcurrants are heavy feeders.
Consider watering the bushes if the summer is very dry, especially in the early years. The first fruit is produced in the second season after planting, and full cropping is reached after five years. At this stage, each bush will produce 3 – 5 kilos of fruit.
Varieties
Pruning
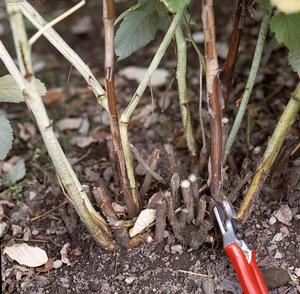
Blackcurrants carry most of their fruit on young shoots. The shoots produced in one year carry flowers and fruit the second year. Pruning aims to provide a good supply of young shoots by removing a proportion of the older shoots each year. Carry out pruning after fruiting, although usually it is done in winter, being made easier by the absence of leaves.
Each year, prune out one quarter to one third of the number of shoots in the bush. Choose the older, darker-barked shoots to go. Prune them out as low down as possible. Annual pruning keeps the bushes to a reasonable size.
Pests and diseases
Big bud mite causes the buds to swell and take on a round shape. The mites feed inside the buds, which are usually ‘blind’. Virus disease is carried by the mites. Pick off and burn any swollen buds.
Greenflies cause curling and discoloration of leaves and reduced growth. They also spread the big bud mites from bush to bush. Control them if there is a bad attack.
Bullfinches eat the buds in winter and can cause serious damage. Use bits of polythene as scares; otherwise, use netting.
Leaf spot is a fungal disease causing small brown spots on the leaves, which, after a bad attack, fall off. It is worst in wet years, and in wet localities. Though not as common as it was, control will be necessary, if it appears.
Reversion is a serious virus disease which ends cropping. The leaf edges of affected plants become less toothed. Dig up and burn these plants.
Gooseberry mildew attacks the young leaves, and shoot tips of blackcurrants, but not the fruit. Prune out affected shoots when noticed.
Varieties
Most raspberry varieties are summer-fruiting producing fruit on the canes of the previous year but, called primocane or autumn-fruiting varieties, fruit in August and September. For a long time ‘Malling Jewel’ was the most popular summer variety and it is still around. It is robust, tolerant of less-than-ideal conditions, resistant to virus diseases, and relatively early to crop in summer. Its lack of high yields is not a problem in a home garden. Raspberries do well in relatively cool climate and have been grown and bred in Scotland, many of the varieties having Glen in the name.
‘Glen Clova’ was a very famous variety but is largely superceded by ‘Glen Moy’, an early variety with large fruits of good flavour. ‘Glen Ample’ is a vigorous, relatively new variety, mid-season, with heavy yields of large fruit, mid-season. It is spine-free, not that the prickles of raspberry stems are problematic. ‘Leo’ is a late-fruiting, vigorous variety with large fruits of good flavour. ‘Autumn Bliss’ is the best autumn-fruiting raspberry with good yields. ‘Allgold’ is a yellow autumn variety. These can run out of weather in colder areas and in a cold wet autumn.
Planting
Raspberries prefer full sunshine but can tolerate a little shade for part of the day. Shelter must be provided because the canes will be damaged by rubbing against the support wires. Plant about 30 to 40 centimetres apart and space rows about two metres apart. Raspberries can be planted against a wall, fruit being carried facing away from the wall.
Raspberries are not particularly vulnerable to frost damage because they flower fairly late in spring and the flowers are well clear of the soil, but frost damage to the flowers can occur. Canes can be damaged too, at soil level, and frost pockets should be avoided.
Good, fertile, well-drained but moisture-retentive, slightly acid soil is the ideal for raspberries and other cane fruits. ‘Well-drained’ is the key characteristic because the shoots die back in water-logged soil or heavy soil.
Poor soil can be made fertile by applying organic manures and fertiliser. Limy soil is fine, as long as it is well-drained. The ground should be completely free of perennial weeds before planting.
Training
Raspberry canes should be supported by posts and wire. Use 240 centimetres posts, driven 40 – 60 centimetres into the ground, and spaced 6 metres apart. Fix three wires to the posts, at 50 centimetres, 100 centimetres and 150 centimetres above ground level. The canes are tied to these wires using soft jute string.
Care after planting
If they are well cared for, raspberry plants will last twenty years or more. Weeds, especially perennials, must be controlled, by hoeing or digging out in the latter case.
Feed raspberry canes in March, with 30 grams of general fertiliser per metre of row. Apply a mulch of well-rotted manure or compost in May, every year or every two years. If cane growth is poor because of poor soil, apply 10 grams of sulphate of ammonia to each metre of row in May.
Pick the fruit when ripe – over-ripe fruit falls off the plant. Most varieties are summer-fruiting. Some varieties, such as ‘Autumn Bliss’, fruit in September/October. Each 30 centimetres of raspberry row will give about 500 grams of fruit. There will be some fruit in the second year after planting and full cropping is reached after five years.
Pruning
Pruning out the old canes
After fruiting, untie the canes that have fruited and cut them out at ground level. Remove the weakest of the new canes. Aim to have three or four good canes per 30 centimetres of row. Autumn fruiting types should be pruned in February. Tie in the new canes to the wires.
Pests and diseases
Greenflies attack the leaves and shoots, reducing yield and spreading virus disease. Control may be necessary.
Raspberry beetle grubs hatch from eggs laid on the young fruit and bore into the berries from the stem end. Control may be necessary.
Grey-mould (Botrytis) is the most serious, causing the ripening fruit to rot. Control is usually necessary, especially in wet seasons and high rainfall areas.
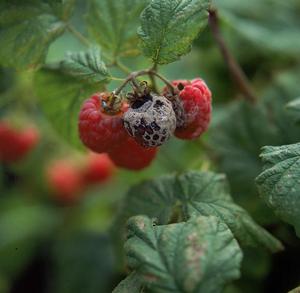
Grey mould disease on raspberries
Virus diseases cause mottling of foliage, stunting, and poor cropping – small fruit and blind fruit. Remove affected plants and burn them.
Cane blight, spur blight and cane spot cause canes or parts of canes to wither and die.
Die-back of canes without signs of disease can be due to unfavourable growing conditions. Raspberry rust causes orange spots on the undersides of the leaves. It does not do much harm. Although there is quite a list of possible diseases, raspberries are generally healthy.
Loganberries, blackberries, tayberries
These cane fruits tolerate poor soil and tough growing conditions quite well – growing even a north facing wall. Blackberries are too vigorous for a small garden and they tend to carry fruit into September and October when it can be spoiled by rain. Training, pruning and feeding, and pests and diseases, are the same as for raspberries.
Varieties
Two established strawberry varieties are ‘Cambridge Favourite’ which has been around for decades, and ‘Elsanta’ which is more recent but well established too. ‘Cambridge Favourite’ is a robust plant with solid rounded fruit, while ‘Elsanta’ has smaller fruit of better flavour. Other varieties that might be offered include ‘Hapil’ with large fruits, ‘Honeoye’ with good flavour and heavy cropping and ‘Symphony’, which is a late cropper and extends the season.
Planting
Strawberries must have full sunshine and an open, airy position. Being low-growing, they can tolerate a reasonable level of wind exposure. Strawberry flowers are sometimes killed – turned black at the centre – by late frost, especially in inland areas and cold districts. Avoid planting in a frost pocket – a low lying area at the bottom of a slope.
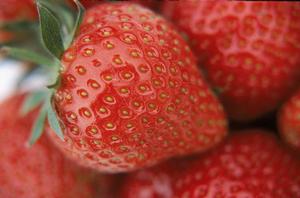
’Elsanta’ strawberrries
Good, fertile, well-drained but moisture-retentive, slightly acid soil is the ideal for strawberries. It must be well-drained because the plants will suffer from fatal red core and crown rot diseases in water-logged soils.
Poor soil can be made improved by applying organic manures and fertiliser. Limy soil is fine, as long as it is well-drained. The ground should be completely free of perennial weeds before planting.
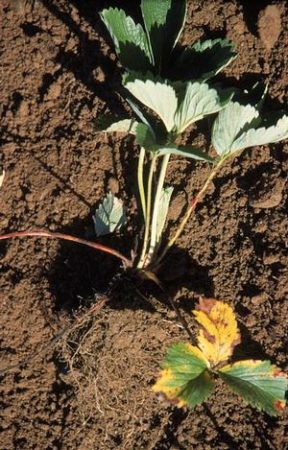
Well-rooted strawberry runner for planting
Plant healthy strawberry runners. If purchasing new stock, buy plants that are Department of Agriculture certified free from disease and pests. Space the plants about 35 – 45 centimetres apart, in rows about 75 centimetres apart. Plant them so that the crown – where the roots and leaves meet – is at soil surface level.
Care after planting
Strawberries must be kept free of weeds, with which they cannot compete. Hand weed around the plants and hoe the alleyways. Planting through a layer of black polythene is sometimes used to prevent weeds and keep the fruit clean.
Pick the fruit when it is ripe – not before – it will not ripen off the plant. After picking is finished, cut away all the leaves and unwanted runners. Remove any weeds that are present. At full cropping, each plant may give up to 500 grams of fruit.
Every spring apply 70 grams of general fertiliser per square metre. On heavy, limy soils, replace this with 35 grams of sulphate of potash per square metre, to prevent excessive leafiness.
Replanting should be carried out every second or third year. If the plants are left any longer, the fruit size gets smaller, and there is a likelihood of pest or disease build-up.
New plants can be planted in early autumn each year, either purchased or raised from runners. The runners should be pinned down in June to give strong plants to lift in August/September, planted 30cm apart and ripped out when they have given runners the following year. This is a way to keep a stock of young plants with large, quality fruit.
Pests and diseases
Greenflies usually appear in April or May and build up quickly. Apart from weakening the crop, they bring virus diseases that render the plants useless. Control will be necessary.
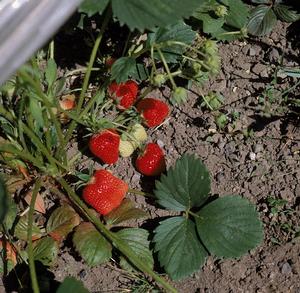
’Cambridge Vigour’ strawberries
Slugs and snails eat the ripe fruit and may destroy a big proportion of the crop in a wet year. Take precautions.
Birds, in particular blackbirds and thrushes, eat the ripe fruit. Netting is the only answer.
Mites, especially red spider mites, may stunt the crop. Control is not easy and it is best to destroy affected plants.
Eelworms get into the crowns and leaves and cause stunting. There is no cure, destroy affected plants. Vine weevil grubs bore into the crowns below soil level and cause reddening of leaves, poor growth and death of plants. Remove and burn plants affected by eelworms or vine weevils.
Grey mould of the fruit is the main disease. It is worst in a wet summer and on older plants where there is inadequate air movement. Improving air movement is the main method of control. Affected fruit should be removed to reduce spread. Spraying with systemic fungicide when the first flowers open is also possible but generally not carried out in a home garden.
Virus diseases of several kinds are spread by greenflies. Affected plants are stunted, show yellow markings and crop poorly, if at all. They should be removed and destroyed.
In recent years, red currants have been making something of a come-back. The flavour of red currants suits the trend in modern cookery towards tangy, less sugary dishes and using fresh fruits. Red currants are not as strong as blackcurrants, although they combine well. They have a soft winey taste with some dryness when eaten fresh. Most of the flavour is in the skins and the berries have a gelatinous pulp with relatively large pips. The structure of the berries breaks down in cooking and the taste becomes more uniform.
Red currants have been grown since the Middle Ages, derived from Ribes rubrum, a European and Asian species. It is related to blackcurrants and gooseberries, producing fruit that more closely resembles the former but a growth habit – without the thorns – of the latter. Red currants are very easy to grow and largely trouble-free. They can be grown as bushes or trained as cordons or espaliers and could be wall-grown if space is limited.
Cooking red currants
Red currants can be eaten raw or cooked. Often used with other summer fruits, or red fruits, such as raspberries and strawberries or blackcurrants in cooked dishes. Being tangy they can be used with both meat and fish dishes and desserts. They make excellent jelly. They are a very good source of Vitamin C with good amounts of iron and calcium, an excellent source of dietary fibre and contain potassium.
Growing red currants
Site and soil: Red currants are quite tolerant of site and soil conditions, but bushes heavily laden with fruit often split branches so some shelter is important. They do not need rich soil but not too dry or hungry soil either.
Varieties
There are a few varieties but the one most likely to be encountered is ‘Red Lake’, sometimes no variety will be given, just ‘red currant’.
Preparation
Dig over the ground and remove perennial weeds in advance of planting. One or two bushes will suffice most requirements, spaced up to two metres apart each way, or as little as one metre apart if wire or wall trained.
Planting
When the leaves colour and begin to fall, planting can be carried out using two-year old bushes. Bushes can be started off from cuttings in November too.
Training
Normally the bushes are trained on a short ‘leg’ and the branches radiating like the spokes of a wheel, training five or six main branches into position. Trained plants will have a single stem for cordons, or spreading branches for espaliers and fans, tying them to shape as they grow.
Pruning
For the first two or three years, pruning will be the shaping of the plant. Later, pruning will consist of cutting back side-growths off the main branches to about five centimetres, allowing the development of fruiting spurs along the main branches.
Picking
Pick the fruit wen ripe. It lasts well on the bush, but birds will take a lot of fruit, especially in dry weather. The fruit can be frozen or cooked and frozen.
Troubles
There is a range of diseases and pests, including gooseberry sawfly caterpillars and greenflies, but generally the bushes escape fairly well.
Hybrid berries are crosses made between red raspberries and blackberries, and in some cases black raspberries which are grown in America. The best known of these is the loganberry which was bred by a Judge Logan in California in the 1880s from a red raspberry and a locl blackberry variety. The loganberry has long dark-red fruits, somewhat tart to taste, but good for jam and dessert. It ripens in stages which is good for continuity.
Since then lots of other crosses have been raised in an effort to improve flavour, size, colour, drought resistance or cold resistance. The boysenberry was raised by Rudolf Boysen, also in California, in the 1920s. This is quite sweet but can be a bit watery and it is drought resistant. The tayberry was bred by the Scottish Horticultural Research Institute as part of a breeding programme for cane fruits and released in 1979. The tayberry is like a large loganberry, good garden variety.
The tummelberry followed from the same breeding programme and it considered a better fruit with winter hardiness that the tayberry lacks and large bright red fruit of good flavour. There are others, less well known, such as youngberry, sunberry and silvanberry, unlikely to be available, while the ones mentioned are available though some searching might be necessary.
Cooking with hybrid berries
The hyrbid berries can be eaten fresh, although some are a little sour to taste, and they are very good for preserves, baking and juicing. They can be used with desserts, especially icecream and yogurt, as fresh fruit, purée, and coulis, and are superb for sorbets. They are an excellent source of Vitamin C with useful amounts of other vitamins and minerals, especially iron and potassium. These fruits contain significant amounts of tannins and antioxidants and act as anti-cancer agents.
Growing hybrid berries
Site and soil: Hybrid berries are generally vigorous and need good rich soil to crop well. However, they can tolerate less-than-ideal conditions and some shade too, especially loganberry. They are perfectly happy on a fence or wall and can use such space very effectively.
Varieties: Loganberry, sometimes offered as a thornless variety, ‘LY 654′, fruits from late July to September; Tummelberry and Tayberry are somewhat earlier. There is a tayberry variety called ‘Buckingham’ which is thornless. Usually one plant is enough because they need three or four metres of wall space.
Planting: Plant in the dormant season ideally, or at any time because these plants are usually available in pots. Prepare the ground well, digging in lots of well-rotted organic material over an are of about one square metre.
Training: The plants are more flexible than raspberries, more like blackberries with long shoots. They can be wall trained, or trained on wires supported by posts, wires at 60cm, 100cm and 140cm above soil. The plants fruit on the previous year’s canes, so the young canes must be tied out of the way while the older canes fruit. This can be done in two ways. One way is to train the fruiting canes along the lower wires and tie the young canes up the centre and along the top wire, or the fruiting canes can be tied along the top two wires and the young canes bent down and loosely tied to the bottom wire.
Pruning: Pruning is done after fruiting in autumn. It consists of cutting away all the fruited shoots and tying in the young shoots in their place. The easiest way to do this is to wrap the new canes around the support wire, rope-like, and tie them to hold them in place. The fruiting side shoots will push out from these shoots.
Watering and feeding: The hybrid berries like plenty of humus and can be top-dressed with compost or well-rotted manure each winter. A shake of fruit fertiliser or general fertiliser in spring will produce heavier crops. Watering is not often necessary but the plants will respond to watering if the weather is very dry in late summer as cropping begins.
Picking: Hybrid are picked as they ripen and they have an advantage in this being spread over several weeks, due to the blackberry parentage. They can be picked and used fresh or frozen fresh. They freeze very well or purée or juice can also be frozen.
Troubles: Generally speaking, the hybrid berries are healthy and robust, not nearly as prone to pests and diseases as raspberries.
Figs are certainly one of the more unusual fruits to be found in Irish gardens. Native to North Africa where it grows on rocky hillsides, Ireland is at the very limit of its range. Given its origin, figs require plenty of sun and warmth and are best planted against a sunny south facing wall. Many of the old walled gardens featured figs and, where they survive, these crop with reasonably regularity, even when neglected.
In warm countries fig trees have the potential to produce two crops of fruit each year but this is not possible in Ireland unless grown with protection where warm temperatures can be artificially maintained from January onwards.
There are only a small number of varieties of figs available, some of which are more suited to glasshouse production while others can be grown outdoors with only a small amount of protection. ‘Brown Turkey’ has been the number one choice for many years. It is a reliable cropper giving oval red fleshed fruit of excellent flavour in August and September. ‘Brunswick’ is a good second choice as it produces large oval shaped fruit some two weeks earlier than ‘Brown Turkey’.
The fig is one of the few fruits that is grown on its own roots. Old trees self-layer where low branches touch the ground and these layers can be used as new trees. When sold in garden centres the young plants will normally have been grown from cuttings and will be two or three years old.
Root restriction is an important element of the management of the fig tree. This can be achieved by planting into a narrow border or in a trough, open at the bottom, made of stone or slate to restrict the extension growth of surface roots. The soil must be free draining in winter but must retain water during periods of drought in summer. It should not be overly rich, quite ordinary soil will do. The tree can be grown in a greenhouse, but it is a large tree and space is required. It can also be grown in a large pot and kept small by pruning.
After planting, tree growth should be encouraged by liquid feeding every month in summer for about two years. During this time the tree will produce long growths that are tied back to the wall in a fan shape, spaced about 50 centimetres apart. If the tree is lanky to start with, it should be pruned to induce the growth of branches lower down. These shoots form the basis of the permanent branch system.
The first young figs will be produced after three or four years. These will not ripen. Any fruit produced on young growth from spring will not normally ripen under Irish conditions, drying up and falling off in winter. For this reason, it is essential to pinch out the spring growths at about five leaves during the month of June. These will then produce side growths which will carry tiny, pea-sized flower buds going into winter. Only the smallest buds will survive the winter and go on to ripen the following summer. Older trees often produce these late side-growths naturally and, for this reason, figs sometimes ripen on old neglected trees.
The fig flower becomes the fruit – it is actually made up of many small flowers internally. In the wild fig, the flowers must be pollinated by a small specialised wasp but the cultivated varieties are self-fertile. In colder areas, outdoor trees will require protection, such as horticultural fleece, in winter. Figs can grow very vigorously and regular pruning is needed in summer. This consists of thinning the number of unwanted growths. In late winter, any surplus older branches can be removed.
The fruit is not difficult to produce but the tree needs close attention to siting, training and pruning. A good summer helps, but there is no more delicious fruit than a ripe, sun-warmed, fresh fig.
There are probably enough south-facing garden walls and house walls in Ireland to supply the whole country’s wine needs if they were all planted with vines! To rewardingly grow grapevines outdoors in Ireland is by no means such an impossible idea as most people might assume.
Naturally, vines can be grown and cropped in any part of the country in a greenhouse or conservatory, but not all of us have the possibility of availing of such a facility. It should be an encouragement to any would-be vine enthusiast that in many parts of the country a vine grown against a sunny wall outside can be productive. The grapes, when fully ripe, are delicious to eat and can be of far better flavour than any you could buy, and, incidentally, quite a respectable wine can be made from them. In the warmest and sunniest areas there are a few varieties which can even be grown entirely in the open, and which can crop and ripen most years, enabling the serious enthusiast to even plant a small vineyard!
It is, however, absolutely essential that a suitable variety is planted. The notion prevailing among Irish gardeners that grapes cannot be grown outdoors, may be due partly to attempts at growing the variety ‘Black Hamburg’ outside – a venture almost certainly doomed to failure. Even for the greenhouse I would suggest that there are many varieties superior to this one, particularly if flavour is what you’re after.
Growing vines on a wall
Left to its own devices, the grapevine grows to be a sprawling, rambling affair, and its vigorous shoots can easily grow more than three metres in one year in Ireland. Its stems are equipped with tendrils, rather like clematis, enabling it to bind itself to the likes of twigs and wires, but it cannot clasp itself onto a wall the way ivy can. For these reasons it is most easily and rewardingly managed when it is trained on a wire trellis.
In Ireland, generally, vines start growing around April on a wall and around May in the open. They make their most vigorous growth from June to August, growing by up to an inch per day, and they flower around June on a wall and in July in the open. Depending on the variety and on the location, grapes are normally ripe in October. However some early varieties on a warm wall can be ripe in August, while later varieties are sometimes not ready for harvest until November.
Planting
Both sunshine and warmth are of course very important to grapevines and only sunny walls facing south, south-east, or west should be considered. Vines grow well in any ordinary, reasonably fertile soil, as long as it doesn’t get water-logged in the winter and isn’t allowed to get bone dry in the summer. Feeding, if any, should be just enough to maintain healthy vigorous growth, and it is very important that vines are not over-fed. A good rule of thumb would be to plant around 1.5 – 1.8 m apart, but they could go as close as 1.0 m apart if desired. Remember that the young vine shoots can be damaged by spring frosts, although a wall vine will invariably escape frost damage, as the wall itself offers protection and shelter.
Training vines
Vines produce their fruit along the bottom 40 cm or so of their current season’s shoots (each shoot producing usually two, sometimes three, bunches of grapes), and the various methods of pruning and training them are all based on this principle. Correct pruning of vines is very important, in order to encourage heavy and regular cropping, but there is no great mystery to it once their growth habit is understood. There are essentially two methods of pruning and training vines, spur pruning and cane pruning.
For spur pruning, a permanent ‘branch’, known as a ‘rod’ or ‘cordon’, is trained, usually horizontally along a wire. From this rod the fruiting shoots grow and are usually trained vertically and allowed to grow to around 1.0 – 1.5 metres long before being ‘pinched out’. These shoots, which are known as ‘canes’ once they are brown and have lost their leaves in autumn, are then pruned back during the winter to short ‘spurs’ consisting of two or three buds. The following year the fruiting shoots grow from these spurs.
With cane pruning, the fruiting shoots are allowed to grow from the buds along a whole cane from the previous year, rather than from spurs. The simplest form of this is called the ‘Guyot’ system. A Guyot trained vine consists basically of a short trunk and either one, or usually two horizontal ‘arms’, trained along a wire. Each winter all shoots are pruned away except two canes arising from suitably near the top of the trunk. These are pruned to around 70 cm long and are tied down to the wire, one cane either side of the trunk, in a ‘T’ shape. These two canes form the arms for the following season, and during the spring and summer, fruiting shoots then arise from all along these arms.
The Guyot system is the usual one adopted for vines grown in the open. Rows of vines would be planted, with plants around 1.2 – 1.5 metres apart in the row, and rows being 1.5 – 2.0 metres apart. The vines are trained on a wire trellis, consisting of a bottom wire for the Guyot arms about 50 cm above the ground, and several further wires up to a height of around 1.5 – 1.8 m to support the fruiting shoots. When the shoots are trimmed at the top wire of the trellis in summer, the rows of vines have the appearance of narrow hedges.
Varieties
If your objective is to get abundant crops of ripe, tasty grapes from your wall vines, or even if you eventually wish to make a nice wine, then the choosing of a suitable variety is of paramount importance. It should be pointed out that the kinds of varieties best for growing outdoors do not produce big fleshy bland-tasting grapes like those from the local supermarket, but rather, quite small though sweeter, juicier and more flavoursome fruit. They are best eaten as one might eat a pomegranate, swallowing the seeds without chewing them, while savouring the rich juice! Without doubt the best variety for growing outdoors in Ireland generally, is ‘Madeleine d’Angevine’. Its bunches of small round grapes are relatively early ripening and are deliciously sweet and juicy when ripe. It can also make a pleasant white wine, though for warmer sunnier areas one could afford to go for a later ripening variety, such as ‘Bacchus’, ‘Schonburger’, ‘Phoenix’ or ‘Bianca’. These are all dual purpose vines, excellent both for eating and for wine-making.
‘Schonburger’ has a particularly appealing pinkish mauve colour when fully ripe, as does ‘Siegerrebe’, which is early-ripening and of quite exquisite flavour. ‘Phoenix’ and ‘Bianca’ are new mildew-resistant hybrid varieties, a boon to mildew-weary gardeners, who now have the possibility to grow healthy grapes, either in a greenhouse or on an outdoor wall without having to worry about spraying them.
It is certainly true that black grape varieties generally require more warmth and sunshine to produce ripe grapes consistently, but with a warm sunny wall, even black grapes can be grown outdoors. ‘Dornfelder’ is a new German vine which produces particularly large bunches of juicy grapes. ‘Dunkelfelder’ on the other hand yields very small, but intensely blue-black bunches, and this variety’s chief attraction is its spectacular scarlet-coloured autumn foliage, equally attractive in a conservatory or against a wall. There are also several good mildew-resistant black grapes: ‘Muscat Bleu’ is rather late-ripening for outdoor culture, but has very good autumn colour; for reliability in cropping and ripening, try ‘Regent’ or ‘Rondo’. All the above varieties are also suitable for wine-making, except ‘Muscat Bleu’.
There are of course many other varieties which one could attempt to grow, if one is lucky both to be living approximately south-east of a line drawn from Dublin to Cork, and to have a good sunny wall in a very warm sheltered locality. Grapes like ‘Riesling’, ‘Chardonnay’ or ‘Pinot Noir’ might even be attempted with some success.
For an established vine of a suitable variety trained on a suitable wall, one may expect a yearly yield of between 1.5 and 2.5 kg of grapes per metre length of rod or cane. A 10 m long wall, planted with about six vines 1.5 m apart, could therefore yield 15 to 25 kg of grapes from about the third year after planting. If one wishes to ‘drink’ one’s grapes rather than eat them, this would translate to around 10-20 bottles of wine per year, and in a good year possibly even more!
(article by David Llewellyn)
To judge by the name, one might think that the Cape gooseberry was originally from the Cape of South Africa, but it is not.It is a South American native, a member of the potato family that is endemic to that continent, related to tomato, sweet pepper, aubergine and chilli pepper, and the less well-known tomatillo and huckleberry. The botanical name is Physalis pruinosa or Physalis peruviana var. edulis, it has had the name ‘Peruvian ground cherry’ and ‘golden berry’ is another common name. The Cape gooseberry, contained within a papery Chinese lantern, is distinctly tomato-like in shape and it is about the size of a cherry tomato. Once you know of its family link with the tomato, you will easily discern the tomato-like acidic tang of the fruit. It is, of course, a fruit, just like the tomato, although it is used mostly as a vegetable, much as the tomato is. It can even be sundried. It has arrived at a food in Europe and in Ireland in relatively recent times, and its use has been largely restricted to a role as garnish on desserts. It is a much more versatile food that that. It is relatively easy to grow successfully, although it has been very little grown in gardens.
Cooking cape gooseberries
Though relatively new, cape gooseberries come from a distinguished family of vegetables, all of which are actually fruits. It could in theory be used in any way that cherry tomatoes are used, fresh or cooked, in salads and stir-fries, even in ice-cream and jam, and very tasty dipped in chocolate. They generally used along with the established vegetables, offering a change of flavour. Cape gooseberry is an excellent source of vitamin C and vitamin A precursor, and a good source of vitamin B-complex with some fibre and calcium.
Growing Cape gooseberry
Site and soil: Cape gooseberry, like tomatoes, is not hardy, although some kinds are perhaps hardier than tomato plants. It is grown like tomatoes, either under glass or polythene or in a sunny spot in really good fertile soil.
Varieties: There are no named varieties, as such, it is usually just sold as Cape gooseberry or golden berry. There can be some variation between seed sources, some are tall, other more spreading.
Sowing: Sow the seeds in early to Mid-March, just like tomatoes for indoor or outdoor growing. Sow three seeds to a small pot and pinch out the weakest, leaving one.
Growing on: A greenhouse is not essential but will generally be used. The young plants can be potted as necessary into a larger pot and kept watered and occasionally given some liquid feed, but not grown too soft or lush either, again like tomatoes. If grown to cropping in a greenhouse, they should be planted ut as soon as they are about fifteen centimetres tall.
Transplanting: The young plants can be hardened off and planted out in late May or early June, or a couple of weeks earlier in a mild garden. Choose a sheltered spot.
Watering: Although the cape gooseberry is a resilient plant, tolerant of drought, it benefits from watering in a dry spell. It is a fast grower and can make a very big bushy plant.
Picking: The chinese lantern covers turn papery when the fruit is fully ripe but the fruits can be used before that happens. When they change colour to yellow-orange, they are ripe. Some people like them a little under-ripe, when the taste is more tart. The first fruits can be picked as soon as they are ready as others will continue to ripen and at the end of the season, the remainder can be picked and stored in their papery covers for a couple of months.
Blueberries have burst onto the home gardening scene in recent years and have gained a reputation with nutritionists as a food with significant health benefits. The crop is easy to grow, if some special requirements are met.
Blueberries are also known as high-bush blueberries to differentiate them from low-bush blueberries. Both kinds, different species, are grown in North America, where they are native, but only high-bush blueberries are grown in Europe. The high-bush types are capable, in ideal conditions of reaching to well over two metres tall, but are generally pruned to keep them smaller and for ease of picking.
Blueberries are related to the wild fraochan or bilberries that grow on moory soils on bogs and mountains in many parts of the country. The fruits of the blueberry are similar in appearance and taste to the wild fruit but much bigger and usually sweeter. Most people are very familiar with blueberries because they are now widely available as imported fruit form America and other countries. There are some commercially grown crops in Ireland and the fruit from these is also supplied to fresh fruit outlets.
Soil requirements
The key to success with blueberries is to provide the acidic soil conditions that they need. The soil acidity needs to be below pH5. This is only available in very acidic soils such as those derived from bogland and acid soils in Wicklow, Wexford, Carlow, Waterford, parts of Cork, Kerry, Galway, Mayo, Donegal, and across Northern Ireland. But even in those areas, soil that has had lime added for vegetables to grow at pH7 and other fruit crops to grow at their preferred pH6.5 will be too limy. Most of the soils in the midlands are naturally too limy. The test would be if the hydrangeas in a garden are blue, then blueberries can be grown in the open soil. If the hydrangeas in the area are not blue, it will be essential to test the soil using a pH test-kit, and these are available from garden centres and they are adequately accurate.
If the soil acidity is suitable, the plants can be grown in the open ground and this is the best way to grow them because they can root out properly and take up the nutrients and water they need. If the soil is too limy, it will be necessary to grow the crop in large tubs or pots, or in polythene-lined pits. The bigger these containers can be the better to encourage plenty of good growth. Plants grown in limy soil suffer nutrient deficiencies and the foliage turns yellow. In soils that are border-line, heavy mulches of acidic material, such as pine or spruce needles can help to acidify the soil and sulphate of iron can be used as a dressing to reduce pH and to supply iron to the growing plants.
Planting blueberries
Blueberries are supplied in pots and can be planted at any time. The traditional, and best, planting time is the autumn when the leaves have fallen. The plants usually need about one metre or more apart. Although the crop likes moist soil and must have moisture through the summer months, it also needs soil that does not become waterlogged in winter. So choose a spot that is not prone to waterlogging. Frost in spring can cause damage to the unfolding buds and severe frost can damage the bark of the stems and to avoid this, plant blueberries higher up a slope rather than at the bottom where frosty air can gather.
There are lots of varieties but the most commonly available are likely to be ‘Earliblue’, ‘Coville’ or ‘Bluecrop’. In many cases, the plants are not named at all, but it is a fair assumption that those made available are suitable. Blueberries do not carry fruit until the bushes are four years old and it is usual to plant two- or three-year old bushes to fruit the following year or perhaps the year after if they are small to start with. The bushes are self-fertile and one bush can be grown on its own, but two varieties provide better pollination and fruit set.
Care of blueberries
Blueberries are surface-rooting plants and do not compete well with heavy weed cover. Hoeing or any form of cultivation tends to damage the feeding roots and weed control is best achieved by using a heavy mulch, ideally of acidic material such as pine or spruce needles or any conifer, and chipped bark mulch can also be used. The mulch can be as much as ten centimetres in depth and topped up every year or two. The ground must be weed-free before mulching and the mulch will help to keep the soil moist during the summer months.
The crop needs adequate moisture when in growth and especially coming up to fruit swelling and ripening. Normal rainfall is usually adequate across most of the country, except for the drier eastern areas, but in dry spells of more than one week the plants will need heavy watering, at least twenty-five litres per square metre. The water used must be lime-free, which may mean using rainwater in limy areas. Watering is the key to success in containers or pits and must not be neglected.
Blueberries also need feeding each year to encourage the new growth on which the berries are carried. The bushes produce new shoots on which flowering twigs are carried after one or two years. The crop needs quite a bit of nitrogen and this is best supplied as sulphate of ammonia. It also needs sulphate of potash for good fruiting. About 15 to 30 grams of each are applied each spring over the surface mulch.
Pruning is not needed for the first three years, except to shape the bushes a little. After that, some of the older shoots can be removed at, or close to, ground level, in the same way as for blackcurrants to encourage new shoots from the base. About one in four shoots should be removed in this manner each year to maintain a rotation of new wood, which carries the biggest fruits, and to keep the bushes to a neat size.
Picking blueberries
The fruits normally begin to ripen in late July and August, depending somewhat on the weather earlier. The crops opens its white bell-shaped flowers in succession in late spring and the fruits also form in succession. The first flowers produced fruits that ripen first and these can be ripe while the later ones are still quite small and green. The ability of the late fruits to ripen depends on the weather and they can drop off without ripening if the weather is poor.
The first fruits are the largest and juiciest. Ripe fruit is dark-blue with a waxy bloom and it is usually ripe about one week after it turns colour. Prematurely picked fruit does not ripen properly and can be very insipid. The plants need to be picked over regularly during the fruit ripening period. Excess fruit can be held in a refrigerator for up to one month, or frozen or pulped and frozen as pulp or juice.
Pests and diseases
Blueberries are generally free of pests and diseases. The main pest is birds which are very fond of the ripe fruit and it may be necessary to net down the bushes to keep them out. The only disease that occasionally arises, especially in a wet summer, is grey mould disease, but if the bushes are planted in an open, but reasonably well-sheltered spot, this should not be a major problem. If rotting is a constant problem, reduce the nitrogen feeding somewhat to toughen the fruit.
Begin using vegetables as soon as they are big enough, while still immature. Carrots, beetroot, peas, celery, turnips, scallions, lettuce, french beans, courgettes, cabbage, cauliflower and broccoli can be used before they attain full size.
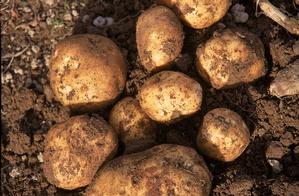
Newly lifted potatoes
These are very tasty at an immature stage and using them early helps both to extend the period of use, and avoid gluts. Only pick as much as is needed at a time. Harvest vegetables in the cool of morning.
Many vegetables keep for only a short time after harvesting. Freezing is a possibility with some types – peas, beans, sprouts, broccoli, cauliflower, carrots, sweet corn, courgettes and tomatoes pulped. Herbs can be frozen in ice cubes.
Root vegetables store well in pits outdoors, protected by a cover of straw and soil, or in a cool shed. This approach is successful with carrots, swedes, turnips, parsnips, beetroot, potatoes and even hard round-headed cabbage. Guard against rats and mice in outdoor pits.
Onions store well when properly dried after harvest. Peas and french beans can be allowed to mature for drying too. Herbs dried slowly store well or they can be frozen loose.
Pests
If ground preparation was good, there should be no perennial weeds. If these appear, dig them out, or spot treat them with Roundup. Vegetables cannot compete with weeds. Begin with weed-free ground and aim to keep it clean.
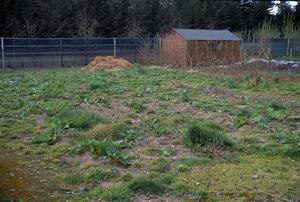
Weeds should be controlled before they go to seed
Control weed seedlings as soon as they appear. Do not allow weeds to get much beyond the seedling stage and never allow them to flower. If no weeds seeds are produced the reservoir fo weeds seeds in the soil will be depleted and weed control made a lot easier in future. The first flush of weeds comes up usually before the vegetable seedlings. When these weeds controlled, the subsequent flushes will not be as strong.
Light hoeing between rows gets rid of the majority. Hand-weed the actual rows of vegetables. Chemical weed control is not a possibility in the vegetable garden, except on pathways, especially if these are permanent. As the vegetable plants fill their allotted spaces, their leaves, especially those of the leafy kinds actively help to keep weeds under control, and relatively few weeds germinate, but these should be controlled.
As soon as crops go over, remove the remaining plants and weeds, and dig the ground. This prevents seeding, discourages pests, and leaves the ground ready for the next crop. Timeliness is all important for successful weed control in vegetables.
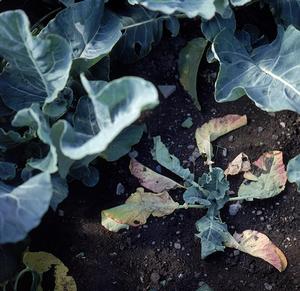
Cabbage root fly damage
Quite a range of pests attacks vegetables. Very many of these are occasional or unusual and are not worth taking precautions against. Some, however, can be relied upon to make an appearance. They include greenflies, cabbage root fly, carrot root fly, cabbage caterpillars, slugs and snails and pigeons. Details on these pests are given in Pests.
Diseases
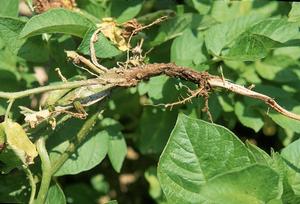
Potato black leg disease
Not many diseases cause problems in the vegetable garden – those that do are mainly soil borne. Among them are onion white rot and clubroot of the Cabbage family. Blight on potatoes will almost certainly appear, but other diseases are occasional rather than certain. Details of these diseases are given in Diseases.
Most kinds of vegetables are sown in March and April and there is often a glut in late July and August. Try to avoid sowing all the vegetables at about the same time.
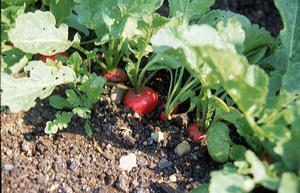
Radish only needs six weeks to mature
Sow early varieties in early spring, indoors if possible, to provide supplies in early to mid-summer; sow maincrop varieties in late spring for use from mid-summer to autumn, and for storage into winter; sow early varieties of quick-maturing types in mid-summer for late autumn supplies of tender vegetables.
Make several sowings of the quick-maturing salad crops – lettuce, rocket, radish, beetroot, scallions – and of white turnips, peas, french beans and carrots. Pay special attention to sowing varieties of cabbage, cauliflower, sprouts, spring broccoli and leeks for use in the period after Christmas and up to June.
Transplanting
Vegetables need enough space for each plant to develop to a usable size. The amount of space varies for each vegetable and may even vary between varieties of a particular vegetable. The seed packets give suggested spacings for each variety.
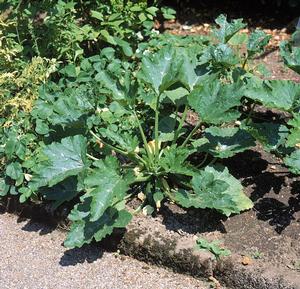
Courgettes need wide spacing
Some vegetables, such as peas, beans, scallions, radishes, potatoes and onion sets, are sown at their final spacing and need no further adjustment. Others do need to be spaced and there are two ways of achieving the final spacing.
Thinning
Many crops cannot be transplanted. The root crops – carrots, parsnips, turnips, swedes and beetroot – would form a useless forked root if transplanted because of the damage caused by lifting. These must be thinned to their final spacing.
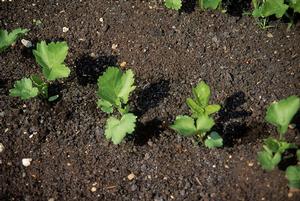
Parsnips after preliminary thinning
Sow the seeds of these crops thinly. Too many seedlings emerge and the surplus is simply pulled out, choosing the strongest to grow to maturity. It is a good idea to thin in two stages. If the final spacing is made when the plants are still young and vulnerable, gaps will be left if some die, or are damaged, for instance, by snails. A preliminary thinning, to half the final spacing, will provide substitutes if there are casualties.
Outdoor sowing
Most vegetables are raised from seed each year. Vegetable seed can be sown indoors in trays, or outside in the open soil, depending on which is most appropriate for the crop and the time of year. Some vegetables are perennial – they do not need to be sown each year. In fact, these are usually purchased as small plants.

Lettuce and onion seedlings
Indoor sowing
Some vegetables are subject to damage by frost and cannot be grown outdoors until the danger of late frost is past – about mid to late May. However, sowing outdoors at that late stage would leave too short a growing season, so these crops should be sown indoors and planted out at the end of May.
This group of tender vegetables includes tomatoes, sweet corn, courgettes, pumpkins, squash, runner beans, celery and peppers. Sowing indoors to extend the season forward can be also used for some of the ordinary vegetables such as cabbage, cauliflower, brussels sprouts, peas, french beans, lettuce and onions to get early crops.
Indoors, in a greenhouse, kitchen window sill or propagator, seeds are sown in trays of seed compost, kept moist and warm until germination occurs. These seedlings are then pricked out into other seed trays, at about 5 centimetres apart each way, or into small individual pots.
The larger seeds of sweet corn, runner beans, french beans and pumpkins can be placed directly in twos into small pots, the better seedling being retained.
Raising perennial vegetables
Although these many kinds can be raised from seed sown indoors or outdoors, they are often purchased as small plants. Since they are perennial, there is no need to sow each year. These vegetables usually occupy the same piece of ground for several years. Many herbs fall into the perennial category, but a few, such as parsley, chervil and dill, need to be sown each year.
Vegetables belonging to the same family tend to be affected by the same pests and diseases, which can build up to damaging proportions if the same crops are grown in the same piece of ground for several years. Therefore, it makes sense to rotate the various families around the vegetable plot each year.
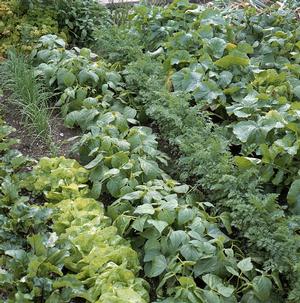
Rotation is difficult to achieve in small plots
However, it is very difficult to maintain a strict rotation in a small garden because of the different sized areas for each crop. There may be several crops of a particular vegetable, for example cabbage, in a single year and this adds to the difficulty of finding a ‘new’ site each time.
Besides, tools and boots are efficient spreaders of pests and diseases, and certain weeds often provide a ‘bridge’ for harmful organisms when suitable crop plants are not available. Because of the wide variety of crops grown and the restrictions of space in a small garden, only short rotations are possible and these are of limited value.
Even so, it is worth trying to avoid following a crop with another of the same family. Rotation offers the opportunity to add organic material and lime to the soil in such a way as to be an advantage to particular crops.
Organic material is very beneficial for potatoes, celery, courgettes and sweet corn, while it tends to make Cabbage family plants too leafy. So, it should be applied before potatoes, etc., and the Cabbage family should be kept away for a while.
Applying organic material before potatoes, each year in a four-year rotation, means that a different quarter of the vegetable area gets it every year and the entire site will be covered by the fourth year. If slugs in potatoes have been a problem, apply the organic matter before the Pea and Onion families instead.
If the soil is acid, and lime is to be applied, apply it before the Cabbage family and keep it away from the Potato family. It prevents clubroot disease of the Cabbage family but encourages potato scab disease. If lime is applied before the Cabbage family, in a four-year rotation, then the whole vegetable area will be covered in four years, which is about right on an acid soil.