Post category: How to grow
Bush roses
Pruning tall varieties growing in a windy situation in November reduces the possibility of root damage by wind rocking and leaves rose beds tidier over the winter. In a mild area, full pruning can be carried out. In colder districts, prune off the top half of tall varieties and complete pruning later.

Rosa ‘Trumpeter’
First, remove all dead, damaged and diseased shoots. Then remove any weak, spindly shoots. Typically, between three and ten shoots will be left. Remove one in three of these from among the oldest, dark coloured shoots.
Shorten the remainder to between 15 – 30 centimetres. Large-flowered bushes should have their shoots pruned closer to 15 centimetres than 30 centimetres. Cluster-flowered bushes should be left closer to 30 centimetres than 15 centimetres. Prune cleanly just above an outward pointing bud.
The ‘head’ of a standard rose is pruned in the same way.
Climbing roses
Note the difference between a climber and a rambler. Climbers are generally not pruned at ground level. Only the top framework is thinned out and the shoots that carried flowers pruned back to 10 centimetres. Weaker climbing varieties should not be pruned quite so much. Climbers are pruned in February or March.
Rambling roses
Depending on variety, all ramblers throw some new shoots at, or close to, ground level each year. Whatever number of new shoots is produced, remove this number of old shoots, choosing the oldest to go. Over-long shoots can be shortened as necessary, or doubled back towards the centre of the plant.
For ramblers that produce very few new shoots at ground level, but produce some new growth further up on the older shoots, prune the older shoots back to one of these young shoots. Then, just shorten back the remaining shoots that have flowered. Ramblers are pruned in summer or autumn, whenever flowering finishes.
Tie in both climbers and ramblers after pruning. Completely overgrown climbers or ramblers can be cut back hard and re-trained. No pruning, other than light trimming, is needed for miniature roses.
Removing suckers
Bush roses, standards and some shrubs and climbers are grafted. Suckers from the root-stock can appear and they will take over if not removed. Dig down below soil level and locate the source of the sucker. Cut it off. Replace the soil and firm it well to discourage further suckering. Suckers are easily recognised because they have more leaflets per leaf, carry more thorns, and grow vigorously.
Dead-heading
Removing the faded flower heads from bush roses, standard roses and continous flowering climbers is worthwhile because it increases and prolongs flowering. Reach down past the faded flower bud and cut the stem at the first strong bud, contained in the axil of the leaf. This bud is usually located about 20-30 centimetres below the faded flower.
Roses are easy to establish but good planting will improve results. They can be planted at any time the leaves are off. November is the best month, but in areas of high rainfall and heavy soil, plant in March. Bare-root plants can be planted from October to March. Container-grown plants can be planted at any time, even mid-summer.
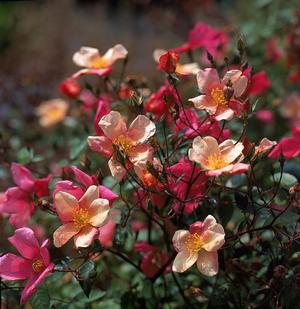
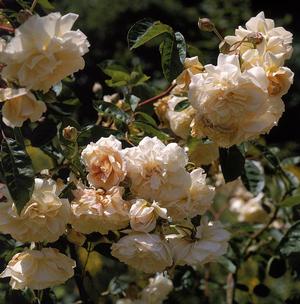
Rosa x odorata ‘Mutabilis’
Select a site and prepare the soil well. Dig holes 30 centimetres deep, 40 centimetres wide and 60 centimetres to 75 centimetres apart. The rows of holes can be staggered, to create a fuller flower effect.
Make up a planting mix of moist peat with a fistful of general fertiliser added per bucket. Mix a 5 centimetre layer of this into the soil at the bottom of each hole. Set up a line to get the rows of bushes straight and parallel to the edge of the bed.
Soak the roots in water before planting. Place the bush in the hole and spread the roots. Scatter some soil over the roots, and shake the plant slightly to settle it in. Plant to the depth of the graft union, where the shoots meet the root.
Firm the soil and fill the hole in two or three stages, firming each layer gently. Water each bush after planting and watch for signs of drought later on. The same planting technique applies to all types.
Shrub roses are spaced informally at 150 – 180 centimetres apart. Keep them about 150 centimetres away from competing shrubs or trees. Climbers are normally planted about 30 centimetres from a wall. Usually planted singly, they can be spaced 200 –300 centimetres apart, or from other wall climbers.
Tie the shoots of climbers into a horizontal position before they get tall. They generally do not flower for two or three years after planting. Tie in the new growth as it develops.
If an old rose bed is to be replanted with roses, the soil must be removed to a depth of 45 centimetres. Refill with new soil that has not grown roses before filled into a cardboard box. This procedure is necessary to avoid a problem called ‘rose replant disease’ that causes stunting and poor growth.
Old rose bushes can be transplanted quite easily. November is the best month.
Roses love sunshine; they grow best, flower most and suffer least from diseases if placed in a sunny position. The ancestors of today’s roses came from warm climates in Europe and Asia. They need all the sun they can get.
Roses do not like windy conditions. Provide shelter of trees, shrubs or hedges if the site is exposed, because wind and rain will destroy the blooms. But do not over-shelter rose plants because the movement of air helps to keep the foliage dry and therefore less vulnerable to disease.
Roses need full sunshine
Roses do not compete well with tree or hedge roots. Planted in an unfavourable situation, invariably the results will be disappointing.
Roses need deep, rich soil that drains well in winter but does not dry out in summer. It is worthwhile removing poor soil from the site for roses and replacing it from the vegetable garden or elsewhere, even buying in some good soil.
Work in plenty of organic material such as rotted manure or compost, or a 7.5 centimetre layer of peat. This improves drainage, retains moisture in summer, and promotes deep rooting. The soil should be completely free of perennial weeds.
Bush roses were bred for use in formal rose beds. The large-flowered bushes are best for formal rose beds near the house, and for cutting. Cluster-flowered bushes are ideal for beds of showy colour and could also be planted in groups at the front of a shrub border, or even singly. Cluster-flowered bushes are better suited to poor conditions, especially wet areas, because their flowers withstand rain better.

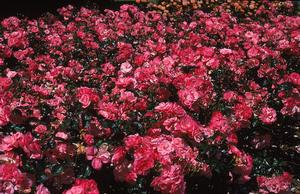
Rosa ‘Lili Marlene’
Choosing bush roses is a matter of personal taste, but there are do’s and don’ts. Choose either large-flowered bushes or cluster-flowered bushes. Do not mix them – the results can be very messy. Neither should varieties of large-flowered bushes be mixed in the same bed because mixed colours take from the effect of formal elegance.
The more showy cluster-flowered bushes can be mixed, but stick to two or three varieties – avoid the ‘fruit-salad’ effect. Try to match the varieties for height – use the taller ones to the back, or the middle of a bed, mixed border or island bed – and choose complementary colours. Research the variety and try to see it growing – visit St. Anne’s Rose Garden, Clontarf, Dublin, or a rose nursery during the flowering season.
Standard roses are used in the middle
Standard roses are used in the middle, or at the back of large rose beds, to add some height. They have long been used as specimens on their own, but less so nowadays. They could also be used in groups, or singly, in a shrub border behind low, non-competitive plants to give summer colour.
Being true shrubs, the shrub roses are best placed among other flowering and non-flowering shrubs. They bring colour to a shrub border in late spring and early summer. The shrub roses can also be planted as specimens on their own and some of them make good informal, secure hedges.
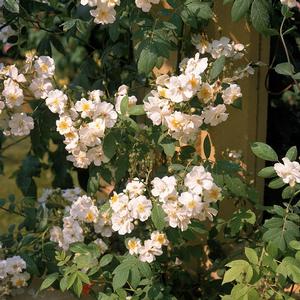
Climbing rose: Rosa ‘Seagull’
The climbing habit of growth of climbing and rambling roses makes them ideal for covering walls and unsightly large objects. They can also be grown on flowering garden trees to give more interest, or on an old tree stump, pillar or pergola.
Miniature roses have become very popular for patio and container growing. They can also be used on rockeries, and as house plants.
Bush roses, also called bedding roses, are upright bushes between 60 centimetres and 150 centimetres in height. Bush roses are grafted on to a vigorous rootstock at ground level by inserting a bud of the chosen variety. Bush roses are continuous flowering. They are often classified as hybrid teas – now correctly known as large-flowered roses – or floribundas – now called cluster-flowered roses.

Roses – the most popular flower
Shrub roses form a bushy shrub, generally between about 120 centimetres and 300 centimetres tall. Their growth habit is generally more vigorous and more ‘floppy’ than the bush roses and so they are wider.
There is a great range of shrub roses. Some are wild species, such as Rosa rugosa and Rosa rubrifolia; some are Old Roses, such as the moss rose and ‘Louise Odier’, and some are Modern Shrub Roses, such as ‘Nevada’ and ‘Frûhlingsgold’. Many shrub roses flower in a single flush. Some are continuous flowering.
Shrub rose: Rosa ‘Buff Beauty’
Climbing roses climb or scramble upwards if given support. They generally produce a mass of flowering shoots at the top of one or two main stems, which thicken with age. The stems are generally upright and stiff. Most climbing roses are continuous flowering and carry large flowers. Some are vigorous versions of bush roses.
Rambling roses also have a climbing habit but they are not as stiffly woody, and the stems are more flexible. The flowering shoots are carried on numerous stems that arise afresh from ground level each year, whereas climbers hardly ever produce new growth form ground level. Ramblers nearly all flower in a single flush of small flowers, mostly in early summer, some in late summer.
Miniature roses and patio are smaller than bush roses but very similar in all other respects. They range in height from 15 – 45 centimetres and are sometimes used as pot plants.
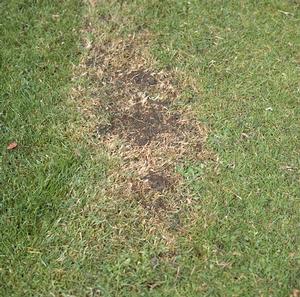
Fairy rings are visible as rings of green, vigorous grass, often with dead patches, that sometimes produce small brown mushrooms as well. The ring is caused by a fungus in the soil. Fairy rings are usually only a problem on good, long-established lawns. Control is difficult. Applying fertiliser, except on the ring itself, masks the problem, and is the best solution in a domestic garden.

Fairy ring in a lawn
Inkcaps and other toadstools arise from bits of rotten timber and other organic material in the soil. When this material finally rots away the toadstools no longer appear. Toadstools are not, strictly speaking, a lawn disease and can be crushed or simply brushed away.
Other diseases sometimes cause yellow, brown or dead patches in the lawn. These are most serious on fine grass mixture and damp, starved lawns. If there is a reddish tinge, caused by red thread disease, on the dying grass, or white growth caused by fusarium, when examined closely, a spray with a systemic fungicide will help.
Leatherjackets often eat grass roots and can cause thin patches. Treading on the affected patches when the soil is reasonably dry helps to control them. In a bad attack, the affected areas can be covered with black polythene for about 36 hours and taken off just before dawn to let birds attack the grubs that have come to the surface. This can be repeated.
Birds, such as starlings and crows, often pull out bits of grass to get at the leatherjacket grubs. This damage is minimal and the birds help to control the grubs.
Earthworms are not a pest in gardens – as they can be on golf greens. If casts are considered unsightly, just brush them away. Dogs may foul lawns and cause scorched patches.
A neglected lawn can be brought back to a reasonable condition by mowing and feeding, weed and moss control, as described in Mowing, Feeding, Weeds and Moss.
A raised bump skinned by the mower
If a lawn was laid level originally, and the level is still good, it is not worth digging it up to make a new lawn. It can be restored. Clear any debris. Use a rotary mower without a grass-bag, or a strimmer, to cut the heavy growth. Rake off the mown grass. Tear out old grass and moss with a rake. Mow again. Apply a spring lawn feed.
Begin regular mowing. Apply lawn weedkiller two or three weeks after feeding in spring. A repeat application of lawn weedkiller might be necessary, and feeding should also be repeated. Moss control may be necessary. Top-dressing and re-seeding overall will help to restore the sward. Then simply maintain routine lawn care.
Bare patches are generally caused by wear, disease, dogs, petrol spillage or they can be caused when weeds and moss are killed off. In a new lawn, uneven sowing or bad germination may leave bare spots.

Lifting lawn sods to remove a bump
In March/April, or September/October, fork the soil surface lightly until the top 5 centimetres is loose. Add a thin layer of moist peat and/or fine soil. Level this out. Sow seed at 30 grams per square metre. Criss-cross the patch with string on pegs, to give it a chance to recover. Thin patches can be treated in the same way.
To repair bumps and hollows, cut and lift the sod. Add, or take away soil, as necessary. Replace the sod and firm it down. The sod re-establishes better if this is done in autumn. For minor hollows, the top-dressing technique described under Feeding is an adequate solution. Repeated over a few years, the hollows will fill up.
Moss thrives where there is dampness. Conditions of poor drainage, compacted soil, heavy soil and shade encourage moss. Avoid siting the lawn where there is dampness or shade. Consider planting such areas with suitable shrubs.
Starved grass, and grass weakened by too tight or irregular mowing, cannot compete with lawn moss. Feed the lawn and mow correctly as the first step to control. Scarifying, by heavy raking or a hired scarifying machine, encourages the grass and dries the soil surface. This can be carried out in autumn or spring.
Chemical mosskillers, such as Lawnsand, sulphate of iron, Mosgo Lawn Mosskiller and Bayer Mosskiller and Lawn Tonic will control moss, but if the conditions remain the same, it will recolonise the area.
Mosskillers are useful for giving the grass a once-off chance to recover while correct mowing and feeding are carried out. On chronically mossy areas, repeat applications will be necessary every year, or every few years, depending on the extent of the problem.
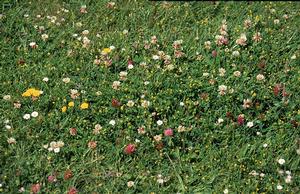
A few weeds in a lawn are no great problem – indeed, it can be quite attractive to have a few daisies! However, a heavy infestation by weeds, such as daisies, clover or speedwell can squeeze out the grass, spoil the look of the lawn and reduce its ability to withstand wear.

One day after spraying, daisies curl up to die
Weeds cope better than grass with low levels of soil fertility. Starved grass is susceptible to competition from weeds, so feeding the lawn is essential. Irregular ‘scalping’ of the lawn opens the grass sward and allows weeds to become established. Too tight mowing weakens the grass and this also gives weeds a chance.
Daisies and most other lawn weeds can grow flatter than lawn grass and thrive on tight mowing. Regular mowing, using the grass-bag, prevents existing weeds from seeding and spreading.
When weeds have become too dominant, a chemical lawn weedkiller can be used to help restore the balance, but feeding will be necessary as well. A variety of lawn weedkiller products is available. Use a product contianing the active ingredient mecoprop to control clover.
These contain similar active ingredients and are best applied in fine, warm weather when growth is active. April, May and June are ideal, but they can be applied between March and September after warm weather when the soil is moist. Feeding the grass two weeks before application improves results.
Combined feed and weed products work well and have the advantage of convenience, but they can be expensive if a large area has to be treated. The weedkilling function only works well in warm weather.
Lawn sand is a traditional lawn tonic combining feeding and weed suppression. Twenty parts clean sand, 3 parts sulphate of ammonia and one part sulphate of iron is the formula. Ready made lawn sand products are convenient to use.
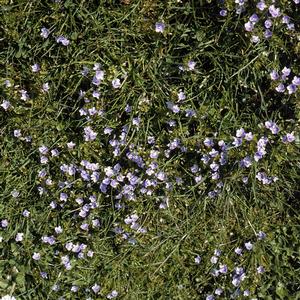
Lawn speedwell
Speedwell has pale blue flowers in April. It is quite difficult to control. Lawnsand will give some control.
Mind-your-own-business or baby’s tears, or helxine is a common weed of shady, damp corners. It spreads over the surface of the soil swamping grass and will even climb over damp stones. Use lawn sand.
Apart from feeding, the secret of a good lawn is correct mowing – frequent, regular mowing, starting early in the year and finishing late.
Start in late February or early March. Around that time there is usually a dry spell when the ground is firm enough and the grass dry enough to cut. Continue mowing at fortnightly intervals until May, when weekly mowing becomes necessary.

Regular mowing is the key to success
Mow frequently and there will be less grass to remove each time. Continue weekly mowing through the summer, except in hot, dry weather, when growth eases off.
Fortnightly mowing is adequate in September and October. Continue into November if the ground is still firm. Even in winter, if there is a dry, mild spell, it is a good idea to ‘top’ the grass. Above all, avoid irregular mowing – it weakens the grass and encourages weeds and moss.
The first mowing in early spring should just be a trim with the blades set high. Gradually lower the blades until the desired height is reached. Do not be tempted to mow very tightly. Very tight mowing weakens the grass unless it is well fed and cared for.
A mowing height of between two and five centimetres is ideal for most Irish lawns – the second lowest and second highest setting on most mowers. The higher level is ideal for rougher lawns and those getting a lot of wear. The lower level is suitable for good quality lawns. The desired height of cut should be maintained when weekly mowing starts.
Raise the blades during drought spells, and towards the end of the season. Any winter ‘topping’ should be done at the highest setting.
The grass-box, or grass-bag, should always be used, unless a mulching mower is used. Mowing is easier, faster and safer, and weed control is improved by collecting seed heads instead of spreading them.
Mulching mowers give good results with dry grass but the mower model should be dual purpose – capable of carrying a grass bag for use when the grass is damp, which is likely early and late in the season.
The removal of the mown grass from a lawn gradually reduces soil fertility because the nutrients in the removed grass are not recycled. Plant nutrients are also removed by rainfall. Feeding is necessary to replace lost nutrients, to encourage healthy grass growth and to allow the grass to compete with weeds and moss.

Feeding is essential
The first spring feed of the year is the most important because the grass will be hungry and weak after winter. Apply fertiliser in March or April to set it up for the growing season. Use a spring lawn feed, which is specially formulated for lawn grasses.
These fertilisers contain the nutrient nitrogen that the grass badly needs but, also, phosphorus and potash for balanced growth. General fertilisers such as 10:10:20 or 7:6:17 are not really suitable for a lawn, because they do not contain enough nitrogen. But they may be used, especially on light soils that are low in nutrients.
Use fertilisers at the rate recommended on the pack. Do not use more fertiliser than advised, or apply it when the grass is already growing strongly, as it only increases mowing. Apply fertilisers evenly to moist soil when rain is expected, or water them in on small areas. Scorching of the grass can be caused by uneven application, particularly in dry conditions.
Feeding can be repeated at least twice, at two-month intervals, using the specially formulated lawn fertilizers. Sulphate of ammonia (containing nitrogen only) and other agricultural high-nitrogen fertilizers, such as urea and CAN, can also be used if large areas are involved, because they are cheaper.
But there is a greater danger of scorching the grass through over-use of these because these are more concentrated, quick-release fertilizers and they can cause a very sudden burst of vigorous growth, and a lot of mowing!
There are also slow-release fertilisers which release the nutrients slowly over a period of months and this avoids the rush of growth after feeding with the normal fertilisers. These are more expensive than farm fertilisers but less effort in mowing.
Lawns can be fed in autumn as well to supply phosphorus and potash to toughen the grass before winter. Autumn lawn feeds should be applied in September or October.
Sulphate of iron can be used in autumn and winter to toughen grass, give it a good green colour and to reduce mowing the following spring. Apply 300 grams per 100 square metres every 6 to 8 weeks from the end of August to April. Spray it on, diluted in 5 litres of water, or apply it dry mixed with about 20 parts sand. This will control lawn moss too.
Wild flower lawn
In September/October, or March/April, a very good quality lawn should get a top-dressing of fine soil mixed 50:50 with peat. One bucketful per 4 square metres will give the grass new rooting material, and boost growth. It is quite a deal of effort to mix and spread a top-dressing, but very effective. A very good lawn should get this each year, but top-dressing can also be used once-off to boost a thin lawn, especially on poor soil. Some fertiliser and seed can be added to the mixture in the latter case.
The best sowing months are September and April, but grass can be sown in most months, even in winter, if the soil is moist, neither too wet or too dry. If there is a little heat in the soil, the seed will take in a couple of weeks, but it will take much longer in cold weather. In September, wait until a spell of rain has moistened the soil. In April, wait until the ground has dried out after the rainy months.
For very good quality lawns that will get little wear, and full care, use a Number One seed mixture, which contains fine, low-growing grasses. For an average lawn with reasonable wear, and adequate maintenance, use a Number Two mixture. This contains both fine grasses and tough grasses and it is ideal for most gardens.
A Number Three mixture contains tough, hard-wearing, vigorous grasses. It is suitable for heavy wear situations, but remember that if it does not get heavy wear it will need more cutting. Buy enough seed to sow about 20 grams per square metre. Grass seed is relatively cheap and it is best to achieve a good dense sward from the start.
Choose a still day after a few fine days when the soil is moist but not wet. Rake the soil. Scatter seed in two directions to get an even spread. Using a yard brush, or rake, gently cover the seed with soil.
If there is no rain for a week or so, and the soil has dried out before the seed sprouts, water the soil with a fine sprinkler. Coarse spray droplets wash the seed away – give a single heavy soaking rather than several light ones.

Hig quality lawn
When the grass reaches 7 to 8 centimetres, it should get its first cut. This is just a trim to encourage the young plants to thicken up. Set the mower high. Do not cut too tightly because it weakens the new grass. There will be no need for rolling if the ground has been firmed and allowed to settle before sowing.
Some soft weeds may appear with the new grass, but there is no cause for alarm because the mower will soon control them. These are usually annual weeds of cultivated ground such as groundsel, fumitory and chickweed. They have no storage roots and soon die out under mowing. If ground preparation has been thorough, there will be no perennial weeds at this stage. Mow the new lawn each week through its first growing season.
The key to success in laying a lawn is careful soil preparation. If soil conditions vary a lot, the lawn will not be uniform, therefore, take some time over soil preparation. Prepare for spring sowing during the previous autumn and winter, and for autumn sowing during the summer.
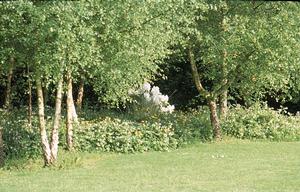
Lawn meets garden woodland
A weed-free start is essential. Use Tumbleweed or Roundup to control existing grasses and weeds, including perennial weeds. If the weed cover is heavy, a second application might be needed. Level the surface after the initial weedkiller application. Then wait four to six weeks and spray again. Rake the surface and wait again before applying another spray of Roundup or Tumbleweed.
Waiting and repeat spraying is known as the ‘stale seed bed’ technique and it is a way of getting rid of wild grasses and weed seeds that are in the top few centimetres of soil. It is not essential to go to these lengths in preparation but this approach ensures a clean start for the lawn grasses and avoids contamination with wild grasses. While it is possible to control broad-leaved weeds after sowing, there is no easy way of controlling wild grasses.
Large stones, old tree roots and other rubbish should be removed. Level the humps and fill in the hollows before cultivating or adding extra top-soil. This helps to ensure an even depth of good top-soil. Dig the ground with a spade or use a rotavator if the area is large. Allow the soil settle for at least eight weeks to avoid settling later when bumps and hollows will form. Rake over the area when it has settled and move soil around to fill hollows. The ‘stale seedbed’ technique allows the time for settling to take place ove a large area.
On small areas, it is possible to tread the area when dry to firm the soil and break up lumps. Rake over the area to even out small bumps and hollows. Work in some moss peat at the rate of one giant bale per 13–18 square metres. Work this into the top 5 centimetres during subsequent raking. The peat will give body to sandy soils and help to open the surface of heavy soils.
Continue to rake the ground at intervals of three weeks or so. Suspend operations during the months when the soil is wet. Serious compaction can result from walking over wet soil. Repeated raking levels the ground, settles it, makes it fine and controls small weed seedlings. If a flush of weed seedlings gets a start, use Weedol or Basta to burn them off before they get too big.
Apply general fertiliser at 100 grams per square metres about a fortnight before sowing is planned and rake it in. At that stage, stones more than 2 centimetres across should have been removed the top 2-3 centimetres of soil. These can cause problems with lawn-mowing later and the ground should be raked over until they are removed.
A lawn needs at least 15 centimetres of good top-soil. If the quality of the soil is poor, or if there is not enough of it, the grass will always struggle in competition from moss and weeds. Grass will grow on any soil but if the soil is clayey and heavy, growth will be slow in spring and moss will have an advantage. If it is sandy, the lawn will dry out in summer and clover will be a problem.

Lawn – the perfect soil for flowers and shrubs
Heavy ground should have good drainage and land drains may need to be laid before laying a lawn. Drainage should be adequate to ensure that water does not stand in pools for longer than one day at a time after heavy rain. A soggy lawn will be more difficult to mow during wet weather and will not be accessible for long periods.
In a new house garden, check that the soil has not been compacted below the surface layer. Dig a few test holes to see if the subsoil is hard and compacted. If the soil is compacted, it will be necessary to dig through the compacted layer to uncompacted subsoil below to allow rainwater to drain away. Land drains may also be necessary to aid this process.
If there is not enough soil depth, additional top-soil is well worth getting. Purchased top-soil should be checked on-site at source, before it is loaded, to confirm its suitability. Do not accept poor quality soil, heavy soil, or soil with a lot of large stones and hard clods. Also check the load before it is off-loaded to make sure it is the same as promised.
The ideal site for a lawn is a reasonably level piece of ground that gets full sunshine. A slight slope will not matter – except that it requires more effort to mow – but steep slopes can be very difficult to mow. If there is a slope with a fall of greater than 1-in-3, put in a retaining wall and a terrace, or plant the slope with suitable plants.

An open lawn surrounded by mixed borders
Consider the lawn as a distinctly separate area of the garden, bordered by borders, flower beds, pathways and paved areas – an area of the ground surface of the garden, not a general surface into which these other ground surface treatments are placed.
The lawn should not generally contain other features except perhaps for one or two specimen trees or shrubs, or island beds in a large lawn. Otherwise the impression of space is lost.
Choose a favourable area for the lawn and use trees, shrubs, flowers or paving as appropriate for the rest of the garden. The lawn will look better and will be easier to keep. Choose the lawn area for as much sun as possible.
Lawns in the shade of trees, tall hedges and buildings take longer to dry out and tend to be moss-infested. Near hedges and under trees, they suffer from drought in summer as well. In the shade of trees, use ground-cover shrubs or herbaceous plants instead.
Flowers that germinate, grow and flower in one growing season are called annuals. Some of these tolerate frost and they can be sown outdoors – these are hardy annuals. Annuals that cannot tolerate frost must be sown indoors and planted out when the danger of frost has passed – these are half-hardy bedding annuals.

Cosmos for quick summer colour
Some of the flowers used for bedding, such as bedding busy lizzies, bedding begonias and bedding geraniums, are actually short-lived perennials but they are treated as annuals, raised from seed each year and discarded at the end of the season. Some flowers, such as wallflowers, bachelors buttons and pansies, are sown in one growing season and flower the following year.
Plants that flower each year, and then die down over winter are called perennial flowers. The taller types – from 30 centimetres to 300 centimetres – are used as border perennial flowers. Those that grow to less than about 30 centimetres are used as rock garden or front of border perennials.
Bulbous flowers with bulbs, tubers or corms, are a special category of perennial flowers, and deserve special mention.
Root-rot disease and damping-off sometimes occur if plants are over-watered as seedlings or, later, as plants. The roots die and rot sets in. Avoid over-watering and injury during pricking-out. Use clean trays and compost.
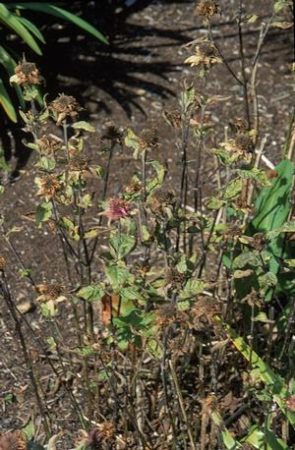
Monarda destroyed by powdery mildew
Virus diseases attack many perennial flowers and bulbs, causing mottling or streaking of the foliage, stunting and reduced flowering. Affected plants should be destroyed. Leaf spot diseases of various types sometimes cause red or brown spots on the leaves of many flowers. These are rarely serious.
Powdery mildew attacks some flowers, especially michaelmas daisies and monarda. Spraying is not worthwhile and if the trouble is persistent, grow something else.
Slugs and snails are the most serious pests of flower plants of all types. Most damage is done in late spring and early summer to young plants and new shoots, especially susceptible plants such as hosta and ligularia. Precautions will often be necessary.
Greenflies cause curling and stunting of foliage, and pass on virus diseases. Control may be necessary. Caterpillars of various types eat holes in the leaves of many flower plants. Unless the damage is extensive, which is unusual, control is not necessary.
Capsid bugs are little beetles that eat the very young leaves as they push out of the ‘bud’. Dahlias and annual asters are especially vulnerable. Earwigs and woodlice are usually responsible for ‘mystery’ damage to foliage and flowers. No pest can be found because feeding is often nocturnal.
Leatherjackets, vine weevils and cutworms are soil inhabitants that attack the flower plant roots or stems at ground level. Eelworm are microscopic pests of flowers. If plants are stunted, ‘bloated’ in the stem, or fail to flower, eelworm may be the cause.
Uses
Included here are bulbous plants with corms such as gladiolis, tubers such as begonias, rhizomes such as cannas and true bulbs – all types of storage organ. Plants in this group find many uses. Bulbs are ideal for use with spring and summer bedding plants, and they are lovely in pots with spring bedding plants, or on their own. They can also be used to bring colour to herbaceous and mixed borders in spring, summer and autumn. Certain bulbs can be used in semi-wild conditions – ‘naturalised’ under trees or shrubs, in grass or ground cover.
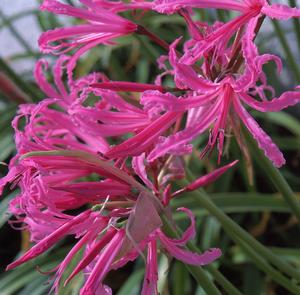
Nerine lily
Plant raising
Bulbs are usually raised as offsets from the mother bulb, and will, in three or four years, grow to flowering size. Many types can be grown from seed too, taking about the same length of time to flower.
Planting
Bulbs need well drained, fairly rich soil, particularly tulips and gladiolus. Plenty of organic material is important to open the soil and allow air to reach the bulbs. Water-logging rots most kinds of bulbs, so avoid damp spots, except for a few that like damp ground, such as cammasia, snakeshead fritillary and leucojum.
Plant the spring-flowering types in October and the summer and autumn-flowering types, such as dahlias and gladiolus in spring/early summer. As a general rule, plant bulbs at a depth equal to twice their height. This helps to support the stems.
For naturalising, plant the bulbs at random, but not too far apart. Simply lift the sod and pop the bulbs in. Bulbs in pots or bowls can be potted up in early September for flowering at Christmas. These should be kept in a cool, dark place indoors, or buried outdoors – bowl and all – until early November when they are brought into a warm room to flower.

Border dahlias
Tender bulbs such as dahlias, gladiolus and begonias, lifted and stored from year to year, can be started into growth in March in a greenhouse or a warm sunny window sill in trays or pots of moist compost. Alternatively, plant them out to their flowering positions, unsprouted, in late April.
Aftercare for bulbs
Bulbs generally need little attention but keep them reasonably weed-free for best results. Some fertiliser, every few years, helps to maintain flowering. Frost-prone plants, such as dahlia, begonia and gladiolus, will have to be lifted in autumn and stored indoors for the winter. They might be risked outdoors by covering them with a layer of peat or ashes.
Bulbs naturalised in grass must not have their foliage mown off until it goes yellow and begins to die. This is usually in late June and a lawn may look very ragged by then. It is best to naturalise bulbs in lawn areas that would not be conspicuously untidy if left unmown, such as under trees. Otherwise, naturalise the bulbs in ground cover, such as ivy, ajuga, or acaena.
Uses
Rock garden perennial flowers are mainly used in rockeries, but the smaller ones can also be grown in alpine beds, and the trailing types are suitable for planting in a dry stone wall. The larger kinds can be used at the front of borders, or as edging near pathways and paved areas.
Plant raising
Many kinds of rockery plants are raised from seed sown indoors in April or September. However, the range of seed available is not great, except from specialist societies such the Alpine Garden Society. Most plants are raised by dividing existing plants in October or March, or by taking cuttings of the spreading types between June and September.
Planting
Being mountain plants, the majority of them like open, sunny conditions. They are smaller than their lowland cousins because they have adapted to the shortage of soil, moisture and nutrients. Provide them with conditions of very free drainage, and adequate, but not very rich, soil.
The top 10 -15 centimetres of a rockery should be mixed specially, using two parts soil, one part peat and one part sand or grit. Alternatively, coarse sand or fine gravel could be dug into the top layer. Plant in October or March/April. Watch for snails.
Aftercare for rock plants
Keep rock garden plants free of weeds – they just cannot compete. A layer of gravel, grit or chippings helps to prevent weeds, and sets off the plants well. Although rockery plants like free drainage, they are used to regular rainfall and will need to be watered in prolonged dry spells. Many rockery perennials self-seed. This may not be desirable, and can be prevented by trimming off the flower heads after flowering.
Uses
Border perennial flowers are used in mixed plantings with shrubs, or on their own in herbaceous borders. Traditionally, the non-woody border perennials were restricted to the herbaceous border, which can be a stunning feature, but demands a lot of attention.
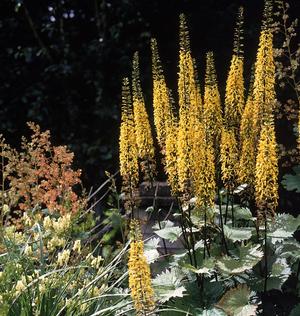
Ligularia stenocephala
A mixed border of herbaceous perennials and shrubs has several advantages. Its shrub content needs little attention, and provides interest in winter, when the border perennials have died down. The border perennials provide colour and lush foliage in summer to soften the harsher outline of the woody plants. The shrubs provide valuable shelter, and shade in some cases, for the herbaceous perennials that fill in around, between and underneath them. In large gardens, where there is plenty space, island beds of border perennials and shrubs can be planted. Perennial flowers can be used as temporary filler plants until shrubs take up the space. Many border perennials provide good cut flowers.
Plant raising
Border perennials can be raised from seed sown in trays indoors in April, or in seed-beds outdoors in May or June for some kinds. Time and method of sowing varies but the seed-packets give good instructions.
Lift and transplant the seedlings into nursery beds at 30 centimetres apart. Grow them on until they are large enough for planting into their permanent positions, usually on autumn. Raising plants from seed is a cheap way to acquire a stock of border perennials.
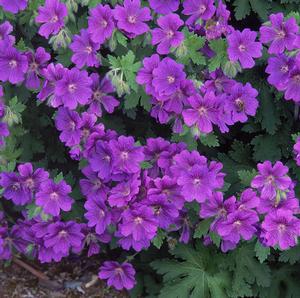
Geranium x magnificum
Alternatively, plants can be purchased, or divisions exchanged. Division, by pulling the crowns apart, or by cutting with a spade, is the main method of plant raising. Plants can be divided at any time during the dormant season, but the usual months are October/November and March/April.
Planting
Plant border perennials in good, well prepared soil with no perennial weeds. Dig over the site and work in plenty of well-rotted manure, compost, straw or peat. About 100 grams of general fertiliser per square metre should be applied. The site should be sunny for most types, and the soil moist but well-drained. Some types, however, enjoy damp conditions; some like shade, and a choice can be made for hot, dry, conditions too.
Planting time is October/November or March/April, when the soil is moist but not wet. Place the crowns a couple of centimetres deeper than they were before lifting. Plant in uneven-numbered groups for best informal effect.
Aftercare for perennial flowers
Hoe around the plants in spring, to prevent weeds becoming established. Mulches of well-rotted manure or compost help to feed the plants and conserve moisture, but some kinds of mulch can bring weed problems too. Dig out perennial weeds, or paint on Tumbleweed or Roundup when they appear.
As the plants grow, some types need to be staked. Place a few sticks or canes close to the plant and run twine around and through the clump of shoots for support. Put support in place in time to prevent plants flopping around. Some plants will need watering when young, and in a dry summer. Watch for signs of drought, then water heavily.

An attractive combination of blue, pink and yellow
When the flowers fade, the plants begin to die back for winter. By October, most of the nutrients in the flower stalk and foliage will have been re-absorbed by the plant. Leave on the withered flower stems and seed heads – these can be very decorative during winter. As the tops become untidy, they can be cut away and the area tidied up. Every few years, the more vigorous plants will have to be lifted, divided and re-planted to keep them to a reasonable size.
Uses
Spring bedding plants can be used in the same ways as summer bedding, namely, in flower beds, in containers, as ‘spots’ of colour between shrubs and border perennials, and even as pot plants, for example, polyanthus and bachelors buttons.
Spring bedding used in hanging baskets is prone to damage by severe winter weather. The baskets should be hung in a sheltered position, or left on the ground in a bright spot until spring.
Plant raising
The seeds are sown in late May or early June in seed trays of good compost, or outdoors in a good seedbed. Water the seed-bed, if necessary, in dry weather. When the seedlings are about 5 centimetres high, lift them, and carefully transplant them to a nursery bed, at a spacing of 20 centimetres each way. Water them if they show any signs of wilting. Protect wallflowers and stocks from cabbage root fly.
Planting
In October or November, when summer bedding has been removed, dig over the ground, incorporating some organic material. Rake in some general fertiliser at 70 grams per square metre. Plant spring bedding at a spacing of about 30 – 40 centimetres apart.
Spring bulbs such as tulips and daffodils are planted when the other plants are in place. They are planted from 15 – 30 centimetres apart. Ground for spring bedding must not get waterlogged – the organic material will help drainage.
Aftercare for spring bedding
Remove any weeds that appear. Firm the plants if they are loosened by the wind. After flowering finishes, in late May, spring bedding is usually discarded to make way for summer bedding plants.
Polyanthus and bachelors buttons can be lifted and planted elsewhere until planting time again. Daffodils and tulips can be lifted and lined out in shallow – 10 centimetres deep –trenches until the foliage dies off when they can be lifted and stored in brown paper bags or boxes until autumn.
If only a few brompton stocks or pansies were planted intermittently for ‘spot’ colour, these can be left to give some flower into the summer. Even wallflowers can be treated as a small shrubby plant, left in position for a few years – only trim off the seed-heads.
Uses
Very effective use can be made of these colourful plants for filing gaps between shrubs, or between border perennial flowers, particularly in the early years of a garden when a lot of bare ground must be covered quickly and cheaply.

An interesting colour mix with annuals
Some of the summer bedding plants, such as petunia, busy lizzie and bedding begonia, make excellent flowering pot plants for the greenhouse, or the home itself.
Plant raising
The half-hardy annual flowers are raised by sowing seed in pots, or in trays of good seed compost in the second week of March. A few slow developers, such as geraniums, busy lizzies and snapdragons should be sown a few weeks earlier.
Use clean trays and purchased seed compost to avoid damping-off disease of the seedlings. Sow the seed as directed on the seed packet. Cover with a sheet of glass and brown paper. Place the tray in a warm place at 20º Celsius – a warm greenhouse, a heated room, or a special propagator.
Do not place seed trays on top of the television, as this is dangerous. Do not place seed trays in the hot-press – it is too hot. Examine the trays each day and remove the paper when the seedlings emerge. Remove the glass a few days later. At this stage, the temperature can be lower and they will be fine in a frost-protected greenhouse or on a bright window-sill indoors, but be careful they do not suffer sun scorch in the first few days.
Prick out the seedlings, spaced at 5 centimetres by 5 centimetres, in trays of fresh compost, about two weeks after emergence. Harden off the young plants about ten days before planting out by placing them outside by day and taking them in at night.
Planting
Dig the ground, working in about 70 grams per square metre of general fertiliser, Vegyflor or Growmore. If the soil is dry, give it a heavy soaking and let it settle for a day. Summer bedding needs good, fertile soil to develop quickly, and flower well. All types enjoy sunshine, but there are a few, such as bedding busy lizzie and bedding begonia, that tolerate light shade.
Using a line to keep the rows straight, plant the summer bedding plants at a spacing of about 30 centimetres each way – a bit more for large types, less for edging and small kinds. If planting time is not dictated by the removal of wallflowers or such like, summer bedding can be planted in early to mid-May in the south and coastal areas, mid to late May in the midlands and north.
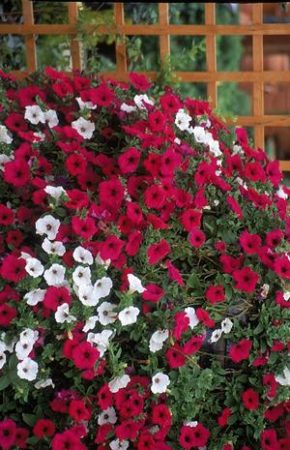
Petunias are great value all summer
Do not be in any rush to plant out, because bedding plants can get a severe shock from cold weather, and be disappointing later on. Water the plants immediately after planting, to settle them in.
Aftercare for bedding annuals
If the weather is dry, water the plants to ensure continued strong growth. Watch carefully for slugs and snails, and use slug-killer if necessary. Hoe lightly between the rows as soon as weed seedlings appear. Do not let weeds get beyond the two-leaf stage.
Summer bedding plants are discarded after flowering finishes in October, except for the few perennial types that are retained. Dahlias and tuberous begonias can be lifted and allowed to dry off in a cool shed. Geraniums can be discarded, if cuttings were taken in August. Otherwise, lift and pot up the plants.

Pots and containers
Plant up pots and other containers in early May, if a greenhouse is available. Grow the plants on, and harden them off in the container. In this way the plants will already be well established when the containers are put outside.
Otherwise, plant up containers in mid- to late May and place them on the ground outdoors, close to a sunny wall, until established. Use trailing types for containers, along with some fuchsias, miniature roses, cordylines or small conifers, to give bulk.
Ordinary soil is not good enough for containers. Use half soil, half peat, and add a small fistful of general fertiliser to each bucketful. Keep containers, especially hanging baskets, well watered. For this purpose, line hanging baskets with polythene.
Pests
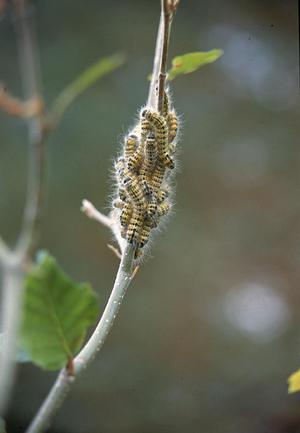
A group of caterpillars on beech
Rabbits and hares cause very serious damage in rural areas. Fencing is the complete answer. Wrapping the stems of young trees with heavy polythene is effective too.
Greenflies feed off many trees and shrubs, especially honeysuckle, viburnum, privet, beech, lime, flowering cherry. Control is usually not necessary.
Caterpillars of many kinds eat the leaves of trees and shrubs, usually leaving holes. Damage is slight and control not necessary.
Leaf miners attack many trees, notably holly, leaving twisting tracks and blisters on the leaves. Though unsightly, control is not necessary.
Red spider mite attacks many trees and shrubs. Control is not necessary, except on dwarf spruces, which could lose all their leaves. Spray in April or May.
More detail on these in the section on Gardening techniques: Pests